Yes, you should paint the inside of kitchen cabinets. This ensures a uniform look and protects the wood.
Painting kitchen cabinets can transform your space and give it a fresh, updated look. While painting the exterior surfaces is common, many people overlook the importance of painting the inside. A consistent finish inside and out not only enhances the aesthetic appeal but also provides added protection for the wood against moisture and wear.
Before starting, ensure to clean, sand, and prime the surfaces for the best results. Choose high-quality paint that can withstand the demands of a kitchen environment. With careful preparation and execution, painted kitchen cabinets can breathe new life into your kitchen, making it both beautiful and functional.
Choosing The Right Paint
Painting kitchen cabinets can revive your kitchen. Choosing the right paint is crucial. The paint you choose affects durability and looks. Let’s explore the best options.
Types Of Paint
There are several types of paint suitable for kitchen cabinets. Each type has its benefits and drawbacks. Here are the common options:
| Type of Paint | Pros | Cons |
|---|---|---|
| Latex Paint |
|
|
| Oil-Based Paint |
|
|
| Chalk Paint |
|
|
Color Selection
Choosing the right color for your kitchen cabinets is essential. It can transform the look and feel of your kitchen. Here are some tips for selecting the best color:
- Consider the Kitchen’s Size: Light colors make small kitchens appear larger.
- Match with Existing Decor: Ensure the color complements your kitchen’s decor.
- Think About Maintenance: Dark colors may show scratches less, but light colors can hide dust and stains better.
Popular color choices for kitchen cabinets include:
- White: Timeless and versatile.
- Gray: Modern and neutral.
- Blue: Calm and inviting.
- Green: Fresh and vibrant.
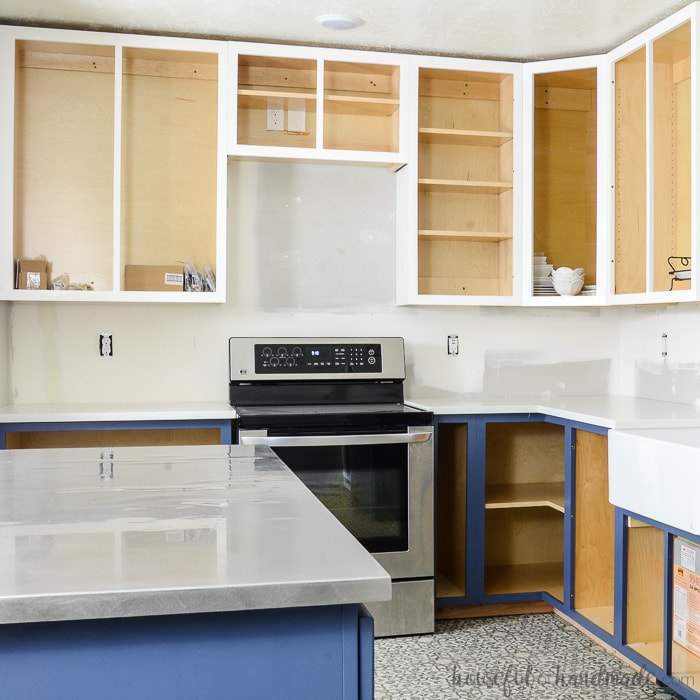
Credit: housefulofhandmade.com
Preparing Your Kitchen Cabinets
Before starting to paint your kitchen cabinets, preparation is key. Proper preparation ensures a smooth and durable finish. Follow these steps to get your cabinets ready.
Cleaning And Sanding
Start by thoroughly cleaning your cabinets. Use a degreaser to remove any grease or grime. This will help the paint adhere better.
- Use a sponge or cloth.
- Rinse with clean water.
- Let them dry completely.
Once the cabinets are clean, it’s time to sand them. Sanding helps to create a smooth surface for painting.
- Use 120-grit sandpaper.
- Sand in the direction of the wood grain.
- Wipe away dust with a tack cloth.
Removing Hardware
Next, remove all hardware from the cabinets. This includes handles, knobs, and hinges.
| Hardware | Action |
|---|---|
| Handles & Knobs | Unscrew and keep in a safe place. |
| Hinges | Unscrew and store separately. |
Label each piece to make reassembly easier. Store screws and hardware in a labeled container.
With these steps, your cabinets will be ready for painting. Proper preparation makes all the difference.
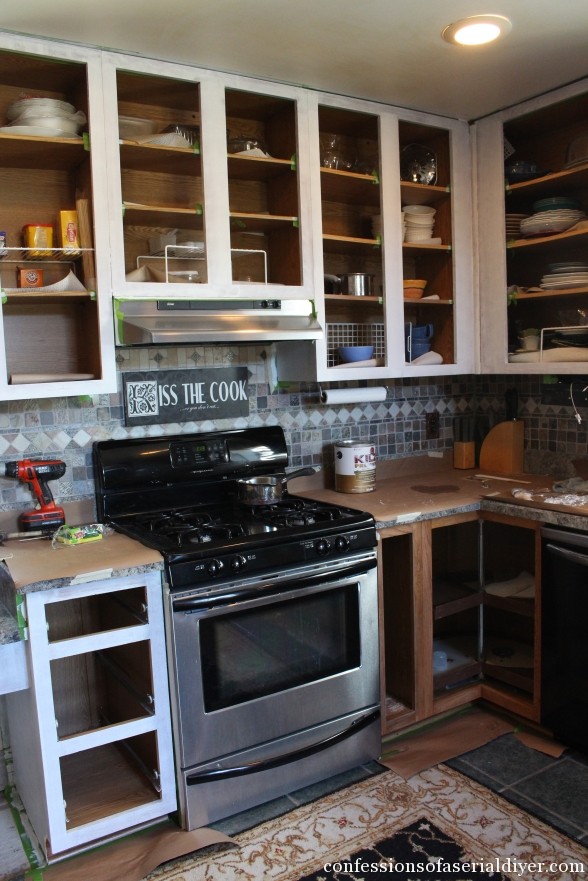
Deciding To Paint The Inside
Painting kitchen cabinets can transform your space. The decision to paint the inside is a big one. It can impact the look and feel of your kitchen. Let’s explore the pros and cons, and hear from experts.
Pros And Cons
| Pros | Cons |
|---|---|
|
|
Expert Opinions
Experts have different views on painting the inside of cabinets.
Sarah Johnson, a professional painter, says, “Painting the inside can give a polished look. It adds a touch of sophistication.”
Mark Davis, an interior designer, shares, “For a quick refresh, focus on the outside. Inside can be painted later if needed.”
Weighing the pros and cons can help you decide. Consider expert opinions and your own needs.
Tools And Materials Needed
Painting the inside of kitchen cabinets can be a rewarding DIY project. It requires the right tools and materials to achieve a professional finish. This section will guide you through the essential tools and recommended materials needed for the task.
Essential Tools
- Screwdriver – For removing cabinet doors and hardware.
- Paintbrushes – Various sizes for different areas.
- Rollers – Small foam rollers for smooth surfaces.
- Sandpaper – Medium and fine grit for surface preparation.
- Drop Cloths – To protect floors and countertops.
- Painter’s Tape – For masking off areas.
- Paint Tray – To hold and distribute paint evenly.
- Cleaning Cloths – For wiping down surfaces before painting.
Recommended Materials
| Material | Description |
|---|---|
| Primer | A high-quality primer for better paint adhesion. |
| Paint | Choose a durable, washable paint for cabinets. |
| Wood Filler | To repair any holes or imperfections. |
| Degreaser | Use a degreasing agent to clean surfaces. |
| Sealer | For a lasting and protective finish. |
Having the right tools and materials will make your job easier and more efficient. Proper preparation is key to achieving a smooth, professional finish inside your kitchen cabinets.
Step-by-step Painting Guide
Painting kitchen cabinets can change your kitchen’s look. This step-by-step guide will help you paint with ease. Follow these steps for a smooth finish.
Priming The Surface
Priming the surface is crucial for a lasting finish. Follow these steps:
- Remove all cabinet doors and hardware.
- Clean the surfaces with a degreaser.
- Sand the cabinets to create a rough texture.
- Use a vacuum to remove all dust.
- Apply a high-quality primer with a brush or roller.
- Let the primer dry for at least 24 hours.
Applying The Paint
After priming, the next step is painting. Here’s how:
- Choose a durable paint suitable for kitchens.
- Use a small brush for corners and edges.
- Use a roller for larger surfaces.
- Apply the first coat evenly.
- Let the first coat dry completely.
- Lightly sand the surface for a smooth finish.
- Apply a second coat of paint.
- Allow the cabinets to dry for at least 48 hours.
- Reattach the doors and hardware.
Painting the inside of cabinets is optional. It can give a uniform look. Consider these points:
| Pros | Cons |
|---|---|
| Consistent Look | More Time-Consuming |
| Protects Wood | Uses More Paint |
| Prevents Odors | Requires More Effort |
Decide based on your preferences and needs.
:max_bytes(150000):strip_icc()/kitchen-cabinet-painting-mistakes-2000-70d96e5b20d34d9f983816d1c06c88db.jpg)
Credit: www.realsimple.com
Drying And Curing
Painting kitchen cabinets can refresh your kitchen’s look. It’s essential to understand the drying and curing stages. These stages ensure a smooth, durable finish. Both are important, but they serve different purposes.
Drying Time
Drying time is the period it takes for the paint to become touchable. This means the paint is no longer wet. Generally, it takes around 1-2 hours for water-based paint. Oil-based paints can take 6-8 hours.
Factors like humidity and temperature affect drying time. A well-ventilated area speeds up the drying process. Use fans or open windows to help. Remember to follow the manufacturer’s instructions.
Curing Process
Curing is different from drying. This process is when the paint hardens completely. It can take up to 30 days for paint to cure fully. During this time, avoid heavy use of the cabinets. Light use is acceptable after a few days.
The curing process strengthens the paint, making it durable. It prevents chipping and peeling. Keeping the area at a stable temperature helps. Avoid exposing the cabinets to extreme conditions.
| Stage | Time Required | Conditions |
|---|---|---|
| Drying | 1-2 hours (water-based), 6-8 hours (oil-based) | Ventilated area, moderate temperature |
| Curing | Up to 30 days | Stable temperature, light use |
Reassembling Your Cabinets
After painting your kitchen cabinets, the next step is reassembling them. This part of the process is crucial for achieving a polished look. Attention to detail is key. Here’s how to do it efficiently.
Reattaching Hardware
Start by reattaching the hardware. This includes hinges, knobs, and handles. Make sure each piece is properly aligned. Use a screwdriver for precise placement. Check that screws are tight but not over-tightened.
- Hinges: Attach them first for structural stability.
- Knobs and Handles: Ensure they are at the same height.
- Screws: Tighten them until they are snug.
Properly reattaching hardware ensures doors and drawers operate smoothly.
Inspecting The Finish
Next, inspect the finish of your cabinets. This step is essential for a flawless look. Look for any drips, uneven areas, or missed spots. Use a flashlight to highlight imperfections. If needed, do touch-ups with a small brush.
Check the following:
- Drips: Sand them down lightly.
- Uneven Areas: Apply another coat if necessary.
- Missed Spots: Fill them in carefully.
Inspecting the finish ensures your cabinets look professional.
Maintenance Tips
Painting your kitchen cabinets can transform your space. Keeping them looking fresh requires some maintenance. Here are some simple tips to keep your painted cabinets in top shape.
Cleaning Painted Cabinets
Regular cleaning is essential. Use a soft cloth and mild soap. Avoid harsh chemicals as they can damage the paint.
Gently wipe down the cabinets once a week. Focus on areas with high traffic such as around handles and edges.
For stubborn stains, create a paste with baking soda and water. Apply it to the stain, let it sit for a few minutes, then wipe off with a damp cloth.
Touch-up Techniques
Over time, your cabinets might get nicks or chips. Keep some touch-up paint on hand.
Follow these steps to touch up the paint:
- Clean the area with a damp cloth.
- Lightly sand the chipped area to smooth it out.
- Apply a small amount of touch-up paint with a fine brush.
- Allow the paint to dry completely before using the cabinet.
For larger scratches, use a filler before painting. This ensures a smooth finish.
Regular maintenance keeps your cabinets looking fresh and new. Simple cleaning and touch-ups go a long way.

Credit: letspaintfurniture.com
Frequently Asked Questions
Should I Paint The Inside Of Kitchen Cabinets?
Yes, for a uniform look and easy cleaning, paint inside.
What Type Of Paint For Inside Cabinets?
Use durable, washable paint like semi-gloss or satin.
How To Prepare Cabinet Interiors For Painting?
Clean, sand, and prime the surfaces for better paint adherence.
Do I Need To Sand Inside Cabinets?
Yes, sanding helps the primer and paint stick better.
How Many Coats Of Paint Inside Cabinets?
Two coats are usually recommended for even coverage.
Can I Use A Roller For Cabinet Interiors?
Yes, a roller provides a smooth finish and covers quickly.
What Primer Should I Use Inside Cabinets?
Use a high-quality bonding primer for kitchen cabinets.
How Long To Let Paint Dry Inside Cabinets?
Allow at least 24 hours for the paint to dry completely.
Is It Necessary To Remove Doors Before Painting?
Yes, removing doors makes painting easier and more efficient.
Can I Use A Brush For Interior Cabinet Corners?
Yes, a brush works well for tight corners and edges.
Conclusion
Painting the inside of kitchen cabinets can enhance their look and longevity. It creates a uniform appearance and protects against wear. By considering your specific needs and preferences, you can make an informed decision. Happy painting and enjoy your refreshed kitchen space!

