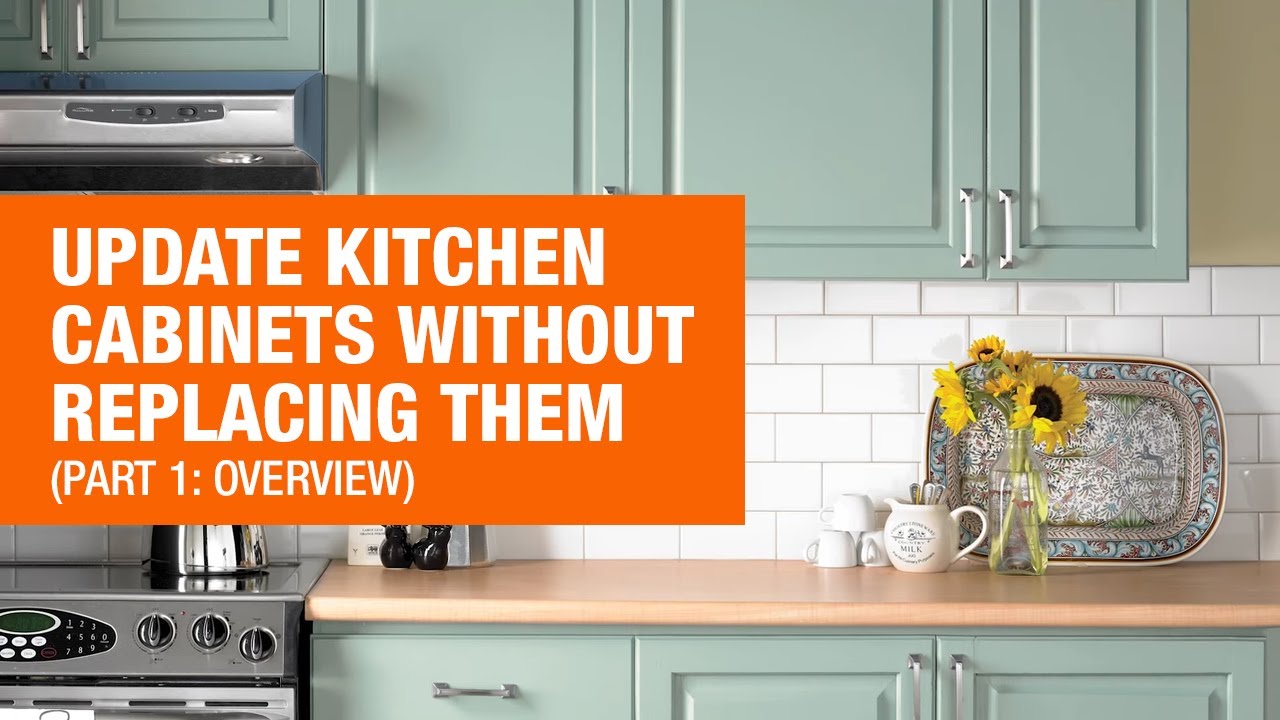
To update kitchen cabinets without replacing them, consider painting, refinishing, or adding new hardware. These methods are cost-effective and transform your space.
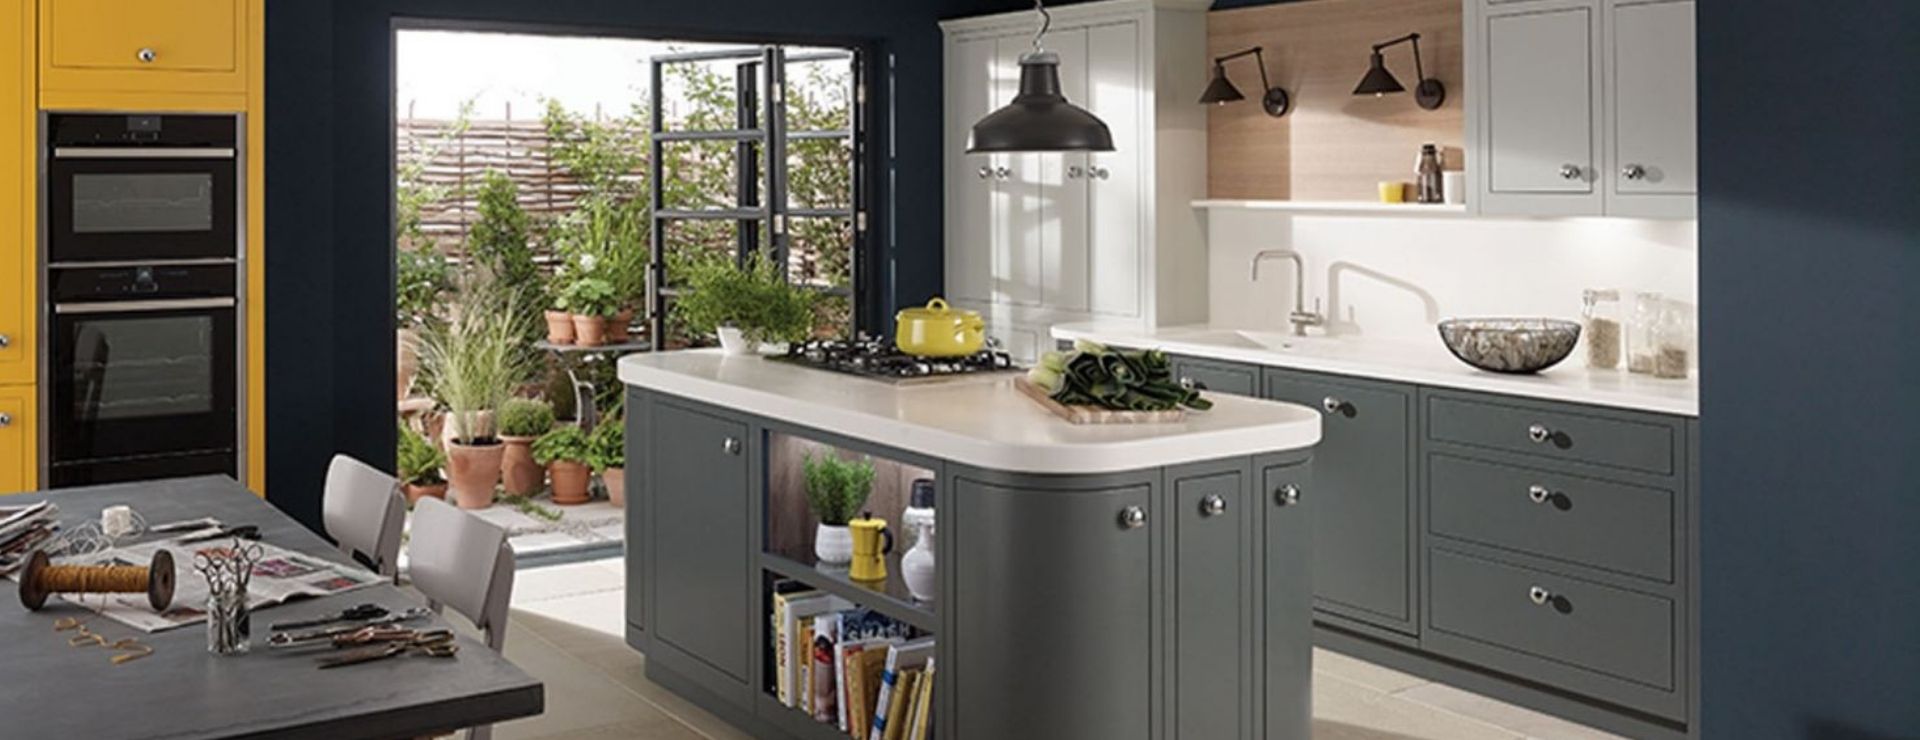
Updating kitchen cabinets can refresh the look of your kitchen without the need for a full replacement. Painting or refinishing offers a fresh, new appearance that can match modern trends or personal style. Adding new hardware, like handles and knobs, provides a quick and easy facelift.
These simple updates can dramatically change the look and feel of your kitchen. By choosing these methods, you save money and reduce waste, making it an eco-friendly option. Updating cabinets can be a fun DIY project or a task for a professional, depending on your preference and skill level.
Refresh With Paint
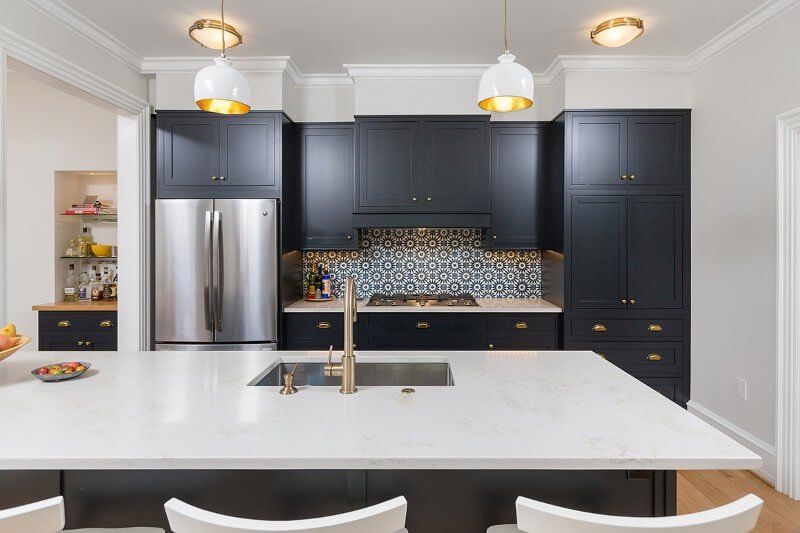
Updating your kitchen cabinets doesn’t always mean replacing them. One of the most effective ways to give your kitchen a fresh look is by repainting your cabinets. This method is both cost-effective and transformative, breathing new life into your kitchen space.
Choosing The Right Color
Picking the right color is crucial. It sets the tone for your kitchen’s overall look. Bold colors like navy or forest green can make a statement. Light colors such as white or beige can make the kitchen feel larger and brighter.
Consider your kitchen’s existing color scheme. Ensure the new color complements your countertops and appliances. Neutral colors offer flexibility for future design changes. Bright colors can add a touch of fun and uniqueness.
Step-by-step Painting Guide
- Remove Cabinet Doors and Hardware: Unscrew the doors and take off handles and knobs.
- Clean Surfaces: Wipe down cabinets with a degreaser to remove any grime.
- Sand the Cabinets: Lightly sand to create a smooth surface for painting.
- Prime the Cabinets: Apply a primer to help the paint adhere better.
- Paint: Use a brush or roller to apply a thin coat of paint. Allow it to dry and apply a second coat if needed.
- Reattach Doors and Hardware: Once dry, reassemble your cabinets.
| Step | Details |
|---|---|
| Remove Cabinet Doors and Hardware | Unscrew doors, take off handles and knobs. |
| Clean Surfaces | Use a degreaser to wipe down all surfaces. |
| Sand the Cabinets | Lightly sand for a smooth surface. |
| Prime the Cabinets | Apply primer for better paint adhesion. |
| Paint | Apply thin paint coats, allowing drying time. |
| Reattach Doors and Hardware | Reassemble once paint is fully dry. |
Add New Hardware
Updating your kitchen cabinets doesn’t always mean replacing them. One simple and cost-effective way is to add new hardware. Swapping out old knobs and handles can transform your kitchen’s look.
Selecting Modern Handles
Choose handles that match your kitchen’s style. For a contemporary look, opt for sleek, straight handles. If you prefer a traditional feel, go for ornate designs with intricate details.
Consider the material of the handles. Stainless steel handles are durable and easy to clean. Brass handles add a warm, classic touch. Ensure the color of the new hardware complements your cabinets. Contrast colors can make the handles pop, while similar hues create a cohesive look.
| Style | Material | Color |
|---|---|---|
| Contemporary | Stainless Steel | Silver |
| Traditional | Brass | Gold |
Installation Tips
Installing new hardware is straightforward. Here are some steps to follow:
- Remove the old handles or knobs. Use a screwdriver for this task.
- Measure the distance between the screw holes. This helps in buying the right size.
- Align the new handle with the holes. Ensure it’s straight before attaching.
- Screw in the new handle. Tighten it securely but avoid over-tightening.
Use a level to ensure handles are even. Uneven handles can affect the overall look. If your cabinets don’t have pre-drilled holes, measure and mark the spots first. Drill carefully to avoid damaging the wood.
Adding new hardware can breathe new life into your kitchen. It’s a small change with a big impact.
Incorporate Open Shelving
Want a fresh look for your kitchen without spending a fortune? Incorporate open shelving! This trend can transform your kitchen into a stylish and functional space. Open shelves offer easy access and add a modern touch to your decor. Let’s explore how to start with removing cabinet doors and styling those open shelves.
Removing Cabinet Doors
First, gather your tools. You’ll need a screwdriver, a drill, and some sandpaper. Begin by unscrewing the hinges from the cabinet frame. Carefully remove the doors and set them aside. Use the drill to remove any remaining screws or hardware.
After removing the doors, sand the edges of the cabinets to smooth out any rough spots. Wipe down the surfaces to remove dust and debris. Now, your cabinets are ready for their new open look!
Styling Open Shelves
Styling open shelves can be fun and creative. Start by choosing a color scheme that complements your kitchen. White dishes and glassware can offer a clean, modern look.
- Use baskets and bins to organize smaller items.
- Display your favorite cookbooks and decorative pieces.
- Keep frequently used items within easy reach.
Arrange items in groups of three for a balanced look. Mix different textures and materials for added interest. Don’t overcrowd the shelves; leave some space for a light and airy feel.
| Item | Suggested Placement |
|---|---|
| Plates and Bowls | Lower Shelves |
| Glassware | Middle Shelves |
| Decorative Items | Top Shelves |
Open shelving offers a chance to showcase your personality. Rotate items seasonally for a fresh look. Your kitchen will feel more open and welcoming with this simple update.
Apply Decorative Molding
Updating your kitchen cabinets can be a cost-effective way to refresh your space. One effective method is to apply decorative molding. This approach adds visual interest and sophistication without the expense of replacing the cabinets.
Types Of Molding
Different types of moldings can transform the look of your cabinets. Each type has its unique style and function.
- Crown Molding: This molding is placed at the top of the cabinets. It adds height and elegance.
- Beadboard: Use this to add texture and a classic look. It’s often placed on cabinet doors or sides.
- Shaker Trim: Ideal for a minimalist design, it offers clean lines and simplicity.
- Rope Molding: This intricate design brings a touch of luxury and detail.
Installation Process
Installing decorative molding is a straightforward task. Follow these steps for a smooth installation.
- Measure: Measure the dimensions of your cabinets. Ensure you have enough molding material.
- Cut: Use a miter saw to cut the molding to size. Precision is key for a perfect fit.
- Sand: Sand the edges of the cut molding. This ensures smooth and seamless installation.
- Attach: Use wood glue and finishing nails to attach the molding. Ensure it is firmly in place.
- Paint: Once attached, paint or stain the molding. Match it with your existing cabinet color.
Applying decorative molding is a simple yet effective way to update your kitchen cabinets. With a variety of moldings and an easy installation process, you can achieve a fresh look without the need for a complete replacement.
Use Peel-and-stick Wallpaper
Updating kitchen cabinets without replacing them is a smart way to refresh your space. One exciting method is using peel-and-stick wallpaper. This simple, affordable solution can transform your kitchen. Peel-and-stick wallpaper is easy to apply and remove, making it a popular choice for DIY enthusiasts.
Choosing Patterns
Choosing the right pattern is crucial. Bold patterns can make your kitchen stand out. Subtle patterns add a touch of elegance. Here are some popular options:
- Geometric designs
- Floral prints
- Marble textures
- Wood grain finishes
Select a pattern that complements your kitchen’s color scheme. Consider the size of your kitchen. Smaller kitchens benefit from light, simple patterns. Larger kitchens can handle darker, bolder designs.
Application Techniques
Applying peel-and-stick wallpaper is straightforward. Follow these steps for a smooth application:
- Clean the cabinet surface with a damp cloth.
- Measure the cabinet dimensions.
- Cut the wallpaper to fit the measurements.
- Peel off the backing paper slowly.
- Stick the wallpaper onto the cabinet surface.
- Smooth out air bubbles with a squeegee.
Ensure the wallpaper adheres well, especially at the edges. Use a utility knife to trim excess wallpaper. This will give your cabinets a neat, professional look.
Peel-and-stick wallpaper offers a fun, easy way to update your kitchen cabinets. With the right patterns and proper application, your kitchen will look stunning in no time.
Install Under-cabinet Lighting
Updating your kitchen cabinets doesn’t always mean replacing them. One great way to refresh your kitchen is to install under-cabinet lighting. This not only adds a modern touch but also improves the functionality of your kitchen space.
Types Of Lighting
There are several types of under-cabinet lighting to choose from:
- LED Strip Lights: These are energy-efficient and long-lasting. They offer a sleek look and can be dimmed.
- Puck Lights: These are round and provide focused lighting. They are great for highlighting specific areas.
- Fluorescent Lights: These are cost-effective and provide ample light. They are ideal for larger areas.
- Rope Lights: These are flexible and easy to install. They are best for adding a decorative touch.
Installation Guide
Follow these steps to install under-cabinet lighting:
- Plan Your Layout: Decide where you want the lights. Measure the cabinet length to ensure you have enough lighting.
- Gather Materials: You’ll need lights, a power source, and mounting hardware. Ensure you have a screwdriver and a drill.
- Mount the Lights: Use screws or adhesive to attach the lights under the cabinets. Make sure they are secure.
- Connect to Power: Plug the lights into an outlet or hardwire them. Follow the manufacturer’s instructions.
- Test Your Lights: Turn them on to make sure they work. Adjust as needed for even lighting.
Installing under-cabinet lighting is a simple way to update your kitchen. It enhances both style and functionality. Choose the right type of lighting and follow the steps for a successful installation.
Add Glass Inserts
Updating your kitchen doesn’t always mean a complete overhaul. You can make a big impact by adding glass inserts to your existing cabinets. This simple update can transform your kitchen, making it look modern and stylish.
Choosing Glass Styles
The style of glass you choose can change the look of your kitchen. Here are some popular options:
- Clear Glass: Perfect for displaying dishes and glassware.
- Frosted Glass: Adds privacy while still looking sleek.
- Textured Glass: Offers a unique, decorative touch.
- Lead Glass: For a classic, elegant look.
Consider the overall style of your kitchen. Clear glass works well in modern kitchens. Frosted glass suits minimalist designs. Textured glass fits in rustic or traditional kitchens. Lead glass adds charm to vintage kitchens.
Diy Installation Tips
Installing glass inserts yourself can save money. Follow these steps to make the process smooth:
- Measure the cabinet door panels accurately.
- Remove the cabinet doors and place them on a flat surface.
- Use a jigsaw to cut out the panel area.
- Sand the edges to smooth them out.
- Fit the glass inserts into the cut-out area.
- Secure the glass with clips or adhesive.
- Reattach the cabinet doors to the hinges.
Remember to wear safety gear. Measure twice and cut once. Ensure the glass fits snugly. If unsure, ask for help from a professional.
Create A Chalkboard Panel
Want a fun and functional way to update your kitchen cabinets? Create a chalkboard panel. This simple DIY project transforms your cabinets into a writable surface. It’s great for jotting down grocery lists, recipes, or family messages. Plus, it’s an easy and affordable way to add character to your kitchen.
Benefits Of Chalkboard Paint
- Versatility: Easily jot down notes, lists, and messages.
- Easy to Update: Wipe clean and write something new anytime.
- Customization: Choose from various chalkboard paint colors.
- Cost-Effective: Less expensive than replacing cabinets.
- Fun for Kids: Kids can draw and stay occupied while you cook.
Application Steps
- Clean the Surface: Wipe down cabinets with a damp cloth.
- Sand Lightly: Use fine-grit sandpaper to prep the surface.
- Tape the Edges: Use painter’s tape to protect surrounding areas.
- Apply Primer: Use a good quality primer suitable for your cabinets.
- Paint with Chalkboard Paint: Apply two coats for best results.
- Allow to Dry: Let the paint dry completely between coats.
- Remove Tape: Carefully peel off the painter’s tape.
- Condition the Surface: Rub a piece of chalk over the entire surface and wipe clean.
With these easy steps, you can transform your kitchen cabinets into a functional and stylish chalkboard panel. Enjoy the new look and the added convenience!

Frequently Asked Questions
How Can I Update Kitchen Cabinets Cheaply?
Paint them. Use new hardware. Add trim or molding.
What Paint Is Best For Cabinets?
Use semi-gloss or satin enamel paint. It’s durable.
Can I Reface Cabinets Myself?
Yes, you can reface cabinets. Basic tools required.
How To Make Old Cabinets Look Modern?
Add new handles. Use modern colors. Install soft-close hinges.
What Is Cabinet Refacing?
Replace doors and drawer fronts. Keep existing framework.
How Long Does Cabinet Refacing Take?
Usually takes 3-5 days. Depends on kitchen size.
Are There Alternatives To Painting Cabinets?
Yes, use peel-and-stick veneers or contact paper.
Can I Use Wallpaper On Cabinets?
Yes, use adhesive wallpaper. Ensure it’s moisture-resistant.
How Do You Clean Cabinets Before Painting?
Use degreaser. Rinse with water. Let them dry.
What Is The Cost Of Refacing Cabinets?
Costs vary. Generally between $1,000 to $9,000.
Conclusion
Updating kitchen cabinets doesn’t require a full replacement. With some creativity, you can achieve a fresh look. Paint, new hardware, and open shelving are excellent options. Consider adding glass doors or adhesive paper for a unique touch. These simple changes can transform your kitchen without a hefty price tag.
Enjoy your refreshed space!

