
Painting your cabinets or adding new hardware can update your kitchen on a budget. These changes refresh the look without expensive renovations.
Updating kitchen cabinets doesn’t have to break the bank. Simple, cost-effective changes can make a significant impact on your kitchen’s appearance. Painting your cabinets is an affordable way to breathe new life into the space. Choose a color that complements your kitchen’s overall design for a cohesive look.
Swapping out old hardware for modern handles and knobs can also enhance the aesthetic. These updates are easy to do yourself, saving on labor costs. Additionally, consider adding adhesive backsplash tiles for an extra touch of style. These practical solutions help transform your kitchen without the need for a complete remodel.
Preparation Tips
Updating your kitchen cabinets can be budget-friendly and fun. Proper preparation helps ensure a smooth process. Follow these tips to get started.
Assessing Current Condition
First, inspect your cabinets carefully. Look for signs of damage like cracks or water stains. Check the sturdiness of the cabinet doors and shelves. Make sure the hinges and handles are secure.
Create a list of any repairs needed. This helps you plan your budget and materials. If the cabinets are in good shape, you can focus on cosmetic updates like painting or new hardware.
Gathering Necessary Tools
Gathering the right tools saves you time and effort. Here is a list of essential tools you might need:
- Screwdriver: For removing handles and hinges.
- Sandpaper: To smooth out surfaces before painting.
- Paintbrushes: For applying paint or varnish.
- Painter’s tape: To protect areas you don’t want to paint.
- Drop cloth: To protect your floors and countertops.
Having these tools ready will make the project go smoothly. You can find most of these items at your local hardware store. Make sure to check your toolbox for any tools you already have.
Painting Techniques
Updating kitchen cabinets can be affordable with the right painting techniques. Painting your cabinets gives a fresh look without breaking the bank. This section will guide you through choosing the right paint and provide a step-by-step painting guide.
Choosing The Right Paint
Selecting the correct paint is vital for a lasting finish. Consider these key points:
- Type of Paint: Use high-quality latex or oil-based paint.
- Finish: Semi-gloss or satin finishes are ideal for cabinets.
- Durability: Choose paints labeled “cabinet-grade” for extra durability.
| Paint Type | Advantages |
|---|---|
| Latex | Dries quickly, easy cleanup |
| Oil-Based | More durable, smooth finish |
Step-by-step Painting Guide
Follow these steps to ensure a smooth painting process:
- Remove Hardware: Take off all handles and knobs.
- Clean Surfaces: Wipe cabinets with a degreaser to remove grime.
- Sand Cabinets: Lightly sand surfaces to create a smooth base.
- Apply Primer: Use a bonding primer to help paint adhere.
- Paint Cabinets: Apply the first coat of paint. Let it dry.
- Second Coat: Apply a second coat for even coverage.
- Reattach Hardware: Once dry, reattach handles and knobs.
These steps will help you achieve a professional finish, even on a budget. Remember to take your time and allow each layer to dry fully.
Refacing Cabinets
Refacing cabinets is a budget-friendly way to update your kitchen. This method involves replacing the cabinet doors and drawer fronts. You also apply a new veneer to the cabinet boxes. It’s a cost-effective alternative to a full cabinet replacement.
Materials Needed
- New cabinet doors and drawer fronts
- Veneer or laminate sheets
- Screws and hinges
- Sandpaper
- Wood glue
- Paint or stain (optional)
- Measuring tape
- Screwdriver or drill
- Utility knife
Installation Process
- Remove Old Doors and Drawers: Use a screwdriver to remove them.
- Clean and Sand Surfaces: Clean all surfaces. Sand to ensure the veneer adheres well.
- Apply Veneer: Cut veneer to size with a utility knife. Apply wood glue to the cabinet box. Press the veneer onto the glue. Smooth out any bubbles.
- Install New Doors and Drawers: Attach the new doors and drawer fronts using screws and hinges.
- Paint or Stain (Optional): You can paint or stain the new doors to match your kitchen decor.
Refacing cabinets transforms your kitchen without breaking the bank. You’ll love the fresh new look!

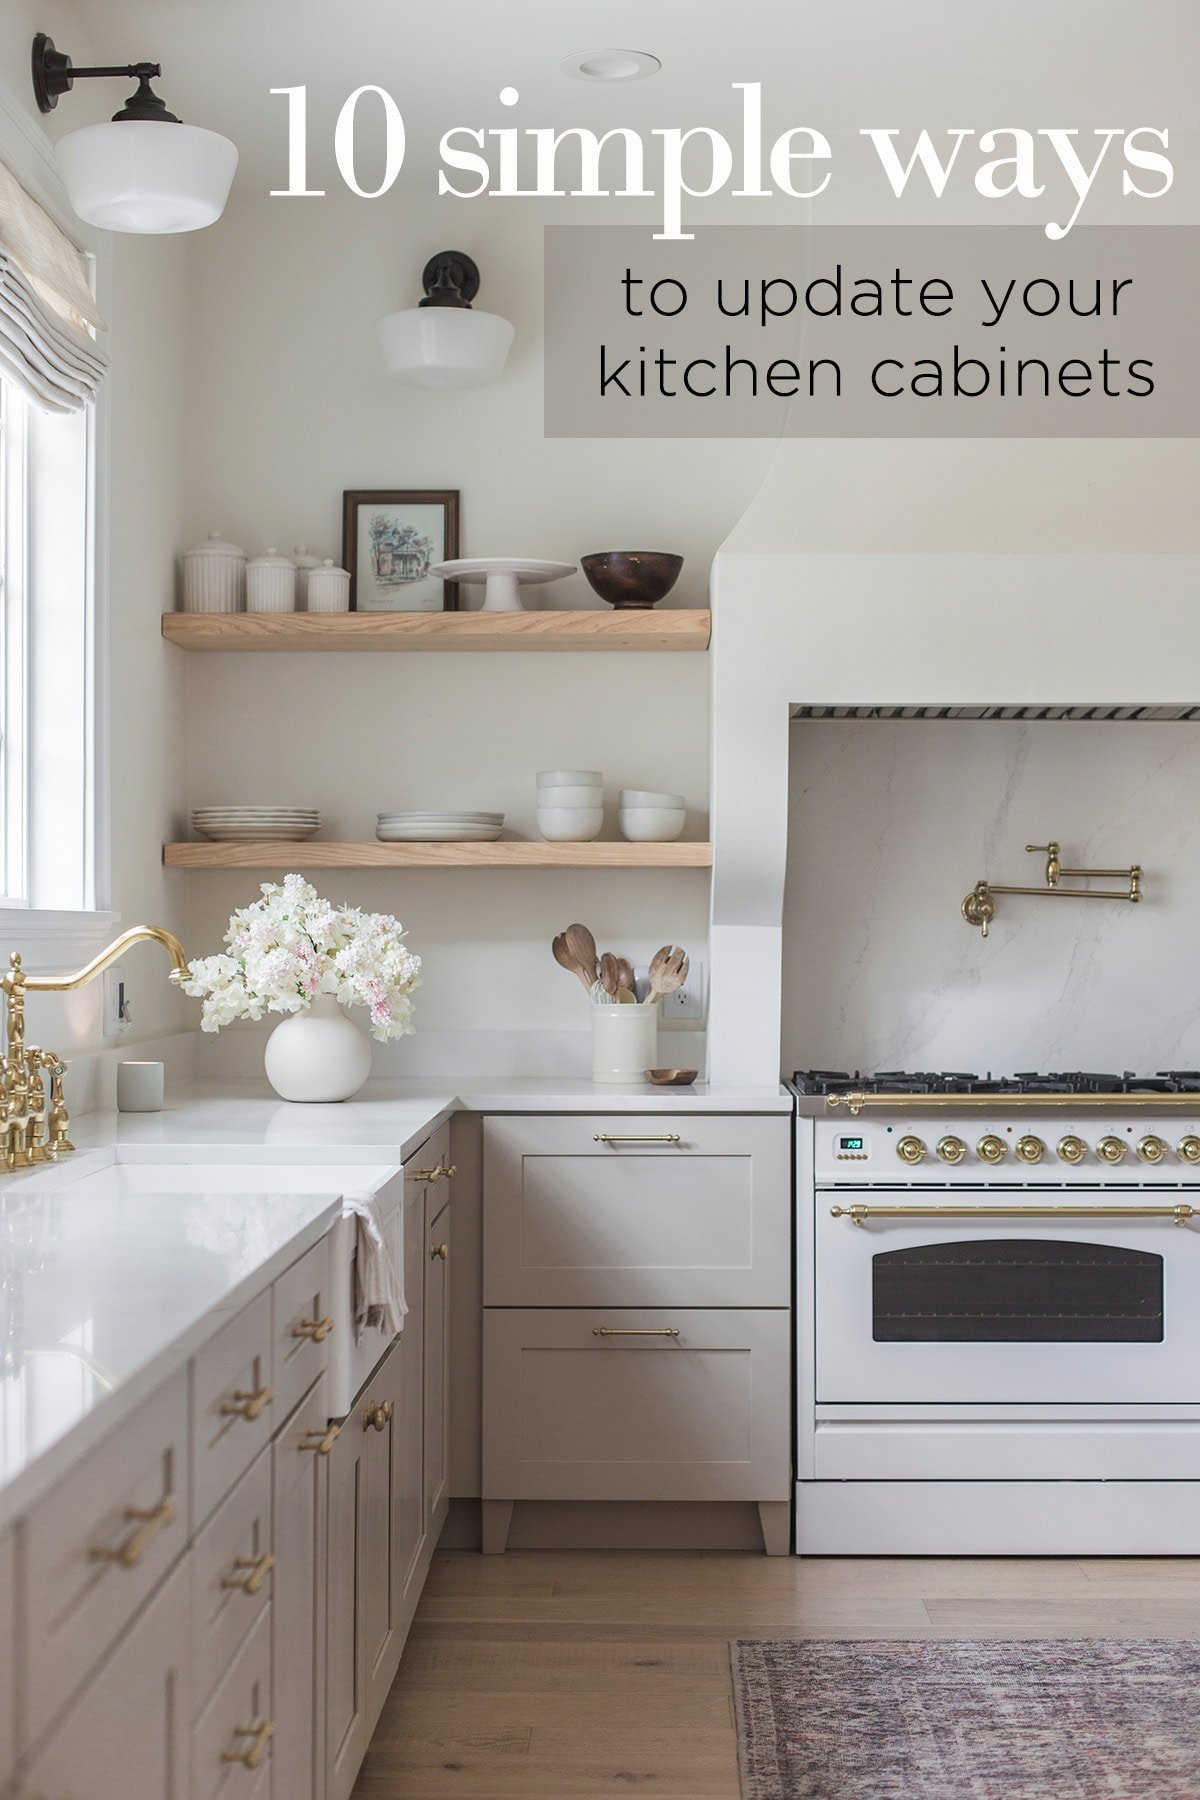
Adding New Hardware
Updating kitchen cabinets on a budget can be simple and fun. One of the easiest ways is by adding new hardware. It can instantly refresh your kitchen without costing much.
Selecting Stylish Knobs
Choosing the right knobs can make a big difference. First, consider the style of your kitchen. Do you have a modern or traditional look? This will guide your choice of knobs.
Material is important. Common options include metal, ceramic, and glass. Each material offers a different look and feel.
- Metal knobs are durable and come in various finishes.
- Ceramic knobs add a unique touch with colorful designs.
- Glass knobs give a vintage and elegant appearance.
Next, think about the shape. Round, square, or novelty shapes can add character to your cabinets.
| Knob Type | Best For |
|---|---|
| Metal | Modern or industrial kitchens |
| Ceramic | Traditional or eclectic kitchens |
| Glass | Vintage or elegant kitchens |
Installing Handles And Pulls
Handles and pulls can also transform your kitchen cabinets. They are easy to install and come in many styles.
First, choose the right size for your cabinets. Measure the distance between the screw holes on your existing handles. This is called the center-to-center measurement.
- Remove the old handles.
- Use a ruler to measure the center-to-center distance.
- Purchase new handles with the same measurement.
Consider the style of your handles. Sleek, straight handles suit modern kitchens. Curved or ornate handles fit traditional kitchens.
Installing handles is simple. Use a screwdriver to attach them to your cabinets. Ensure they are tightly secured.
By adding new hardware, you can give your kitchen a fresh look. It’s a budget-friendly way to make a big impact.
Open Shelving Ideas
Open shelving is a fantastic way to update kitchen cabinets on a budget. It brings a modern and airy feel to your kitchen. Plus, it makes your space look bigger and brighter.
Benefits Of Open Shelving
Open shelving offers multiple benefits. Here are some key advantages:
- Cost-Effective: Open shelves are cheaper than traditional cabinets.
- Easy Access: You can easily reach your dishes and cookware.
- Visual Appeal: They add a stylish and modern touch.
- Customization: You can arrange and decorate as you like.
Diy Installation Tips
Installing open shelves yourself can save money. Follow these simple steps:
- Plan the Layout: Measure the space where you want to install shelves.
- Choose Materials: Select sturdy wood or metal brackets.
- Mark the Walls: Use a pencil to mark where the brackets will go.
- Drill Holes: Drill holes into the marked spots.
- Install Brackets: Secure the brackets with screws.
- Place Shelves: Place the shelves on the brackets and secure them.
By following these steps, you can have open shelves in no time. Remember to use a level to ensure everything is straight. This will make your shelves look professional.
Creative Use Of Wallpaper
Updating kitchen cabinets doesn’t have to be expensive. Wallpaper offers a fun and budget-friendly solution. It adds color and pattern, giving your kitchen a fresh look.
Wallpaper Selection
Choosing the right wallpaper is key. Consider the color scheme of your kitchen. Select patterns that complement your existing decor.
- Vinyl wallpaper is durable and easy to clean.
- Peel-and-stick options are convenient for DIY projects.
- Textured wallpaper adds depth and interest.
Here’s a quick comparison of wallpaper types:
| Type | Durability | Ease of Application |
|---|---|---|
| Vinyl | High | Moderate |
| Peel-and-stick | Moderate | High |
| Textured | Moderate | Moderate |
Application Techniques
Applying wallpaper to cabinets can be simple. Follow these steps for a smooth finish:
- Clean the cabinet surfaces thoroughly.
- Measure and cut the wallpaper to fit each cabinet door.
- Apply the wallpaper starting from one edge.
- Smooth out any air bubbles using a squeegee.
- Trim the excess wallpaper for a neat edge.
Pro tip: Use a primer on the cabinet doors for better adhesion. This ensures the wallpaper sticks well and lasts longer.
Incorporating Crown Molding
Crown molding can transform your kitchen cabinets. It adds a touch of elegance and sophistication. This simple addition can make a big difference without breaking the bank.
Types Of Molding
There are various types of crown molding to consider. Each style offers a unique look.
- Standard Crown Molding: Simple, classic design. Fits most kitchens.
- Stacked Crown Molding: Layers of molding. Provides a grand appearance.
- Rope Crown Molding: Features a rope-like design. Adds intricate detail.
- Dentil Crown Molding: Small, evenly spaced blocks. Offers a traditional look.
Installation Guide
Follow these steps to install crown molding on your kitchen cabinets:
- Measure the length of your cabinets.
- Cut the molding to fit, using a miter saw.
- Sand the edges for a smooth finish.
- Apply wood glue to the back of the molding.
- Press the molding onto the cabinet. Hold it in place.
- Secure with finishing nails. Ensure it’s firmly attached.
- Fill any gaps with wood filler.
- Paint or stain the molding to match your cabinets.

Budget-friendly Backsplashes
Want to update your kitchen cabinets without spending a fortune? A budget-friendly backsplash can transform your kitchen space. It adds a fresh look and protects your walls. Learn about affordable materials and how to install them yourself.
Affordable Material Options
Choosing the right material for your backsplash is crucial. Here are some affordable materials that offer style and durability:
| Material | Price Range (per sq. ft.) | Pros |
|---|---|---|
| Peel-and-Stick Tiles | $5 – $10 | Easy to install, variety of designs |
| Laminate Sheets | $3 – $8 | Durable, easy to clean |
| Beadboard | $1 – $2 | Classic look, paintable |
| Vinyl Wallpaper | $2 – $5 | Moisture-resistant, quick application |
Diy Installation Steps
Installing a backsplash yourself saves money and time. Follow these steps for a smooth installation:
- Measure the area: Measure the wall space accurately.
- Prepare the wall: Clean and dry the wall surface.
- Cut the material: Cut the backsplash material to fit.
- Apply adhesive: Use the right adhesive for your material.
- Place the tiles: Start from the bottom and work up.
- Press firmly: Press each tile to ensure it sticks well.
- Seal the edges: Use caulk to seal the edges.
With these steps, you can create a stunning backsplash. A new backsplash makes your kitchen feel fresh and new. Enjoy your updated kitchen cabinets!
Frequently Asked Questions
How Can I Update Kitchen Cabinets Cheaply?
Paint them yourself, replace hardware, and add new handles for an affordable update.
What Paint Is Best For Kitchen Cabinets?
Use a high-quality, semi-gloss or satin paint for durability and easy cleaning.
Can I Reface Kitchen Cabinets Myself?
Yes, with the right tools and materials, you can reface cabinets yourself to save money.
Should I Replace Cabinet Doors Or Repaint?
Repainting is cheaper and easier. Replacing doors offers a fresh, new look but costs more.
How Do I Choose Cabinet Hardware?
Select hardware that complements your kitchen style. Measure existing holes to ensure a proper fit.
What Is Cabinet Refacing?
Cabinet refacing involves replacing doors and drawer fronts and applying a veneer to the cabinet frames.
Are There Budget-friendly Cabinet Materials?
Yes, consider materials like laminate, thermofoil, or MDF for a cost-effective cabinet update.
How Long Does Cabinet Painting Take?
Typically, it takes a weekend to prep, paint, and allow for drying times.
Can Contact Paper Update Cabinets?
Yes, contact paper can provide a quick and temporary cabinet makeover with minimal expense.
Is It Worth Updating Old Cabinets?
Yes, updating cabinets can refresh your kitchen and increase your home’s value without a full renovation.
Conclusion
Revamping your kitchen cabinets doesn’t have to break the bank. With creativity and a few smart choices, you can achieve a fresh look. Paint, new hardware, and organizational hacks can transform your space. Remember, a little effort goes a long way.
Enjoy your updated kitchen without the hefty price tag.

