You can save money and add personal flair by doing your own kitchen cabinets. It requires planning, tools, and patience.
DIY kitchen cabinets offer a rewarding project for homeowners. Customizing your cabinets allows you to create a space tailored to your needs and style. Start by measuring your kitchen and sketching a layout. Choose quality materials and gather essential tools like screwdrivers, drills, and saws.
Follow detailed instructions or video tutorials to ensure accuracy. Painting or staining your cabinets adds a personal touch. Remember to take your time and double-check measurements. This project can enhance your kitchen’s functionality and aesthetic while saving costs. Enjoy the satisfaction of a job well done.
Planning Your Project
Planning your DIY kitchen cabinets project is exciting. It involves several key steps. Proper planning ensures a smooth process. Start with a clear vision. Focus on setting a budget and choosing a style.
Setting A Budget
Budgeting is crucial for any DIY project. Allocate funds for materials, tools, and unexpected costs. Create a detailed budget plan.
- Materials: Wood, screws, hinges
- Tools: Saw, drill, measuring tape
- Unexpected costs: Extra materials, minor repairs
Research costs online and in stores. Compare prices for the best deals. Consider quality and durability. Spending a bit more on quality can save money in the long run.
| Item | Estimated Cost |
|---|---|
| Wood | $200 |
| Tools | $150 |
| Hardware | $50 |
Choosing A Style
Choosing a style sets the tone for your kitchen. Determine the look you want. Do you prefer modern, rustic, or traditional?
- Modern: Sleek, minimalistic, clean lines
- Rustic: Natural wood, earthy tones
- Traditional: Elegant, classic design
Think about the color scheme and finish. Light colors make a kitchen look bigger. Dark colors add warmth and depth.
Gather inspiration from magazines, websites, and showrooms. Create a mood board. This helps visualize your final design.
Gathering Materials
Starting a DIY kitchen cabinet project requires careful planning. Gathering materials is crucial. You need the right tools and high-quality supplies. Proper preparation saves time and ensures a smooth process.
Essential Tools
Having the right tools is essential. Below is a list of the most important tools:
- Measuring Tape: Accurate measurements prevent mistakes.
- Power Drill: Essential for drilling holes and driving screws.
- Level: Ensures cabinets are perfectly aligned.
- Clamps: Hold pieces together while gluing or screwing.
- Screwdriver Set: Various sizes for different screws.
- Saw: Needed for cutting wood to size.
- Safety Gear: Includes gloves, goggles, and ear protection.
Quality Supplies
Using quality supplies is vital for a lasting finish. Below are some essential supplies:
| Supplies | Description |
|---|---|
| Wood | Choose high-quality plywood or solid wood for durability. |
| Screws and Nails | Use stainless steel for strength and rust resistance. |
| Hinges | Opt for soft-close hinges for a smooth operation. |
| Paint or Stain | Select durable finishes to protect your cabinets. |
| Sandpaper | Various grits for smoothing wood surfaces. |
| Wood Glue | Strong adhesive for bonding wood pieces. |
Gather all these tools and supplies before starting your project. This way, you will be well-prepared and avoid interruptions.
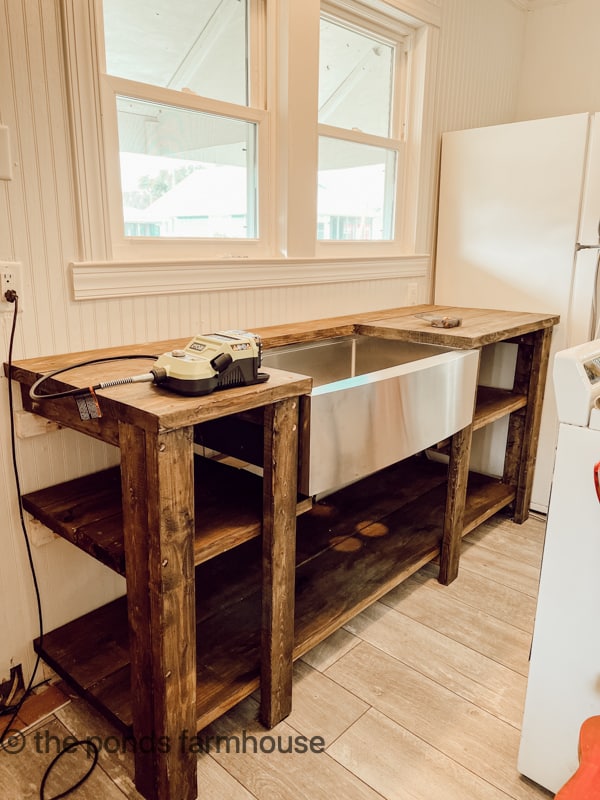
Preparing The Space
Getting ready for a kitchen cabinets do-it-yourself project can be exciting. The first step is to prepare your space. A well-prepared area ensures a smooth installation process. This section will guide you through clearing the area and measuring and marking your space.
Clearing The Area
Before starting, clear the kitchen. Remove all items from the cabinets. Place them in boxes or bins. Make sure the countertops are empty. This gives you enough room to work. Disconnect any appliances that might be in the way. If possible, move them to another room.
| Task | Description |
|---|---|
| Remove Items | Take out all dishes, pots, and pans. |
| Clear Countertops | Make sure all surfaces are free of clutter. |
| Disconnect Appliances | Unplug and move small appliances. |
Measuring And Marking
Accurate measurements are key to a successful cabinet installation. Use a tape measure to measure the height, width, and depth of the space. Write down all measurements.
- Measure the width of the space.
- Measure the height from floor to ceiling.
- Measure the depth of the current cabinets.
Once you have the measurements, it’s time to mark the walls. Use a pencil and a level. Draw lines where the top and bottom of the cabinets will go. This helps you visualize the layout and ensures everything is level.
- Mark the top line for upper cabinets.
- Mark the bottom line for base cabinets.
- Use a level to ensure straight lines.
With the area cleared and measurements marked, you’re ready for the next steps. Preparing the space properly sets a solid foundation for your kitchen cabinets do-it-yourself project.
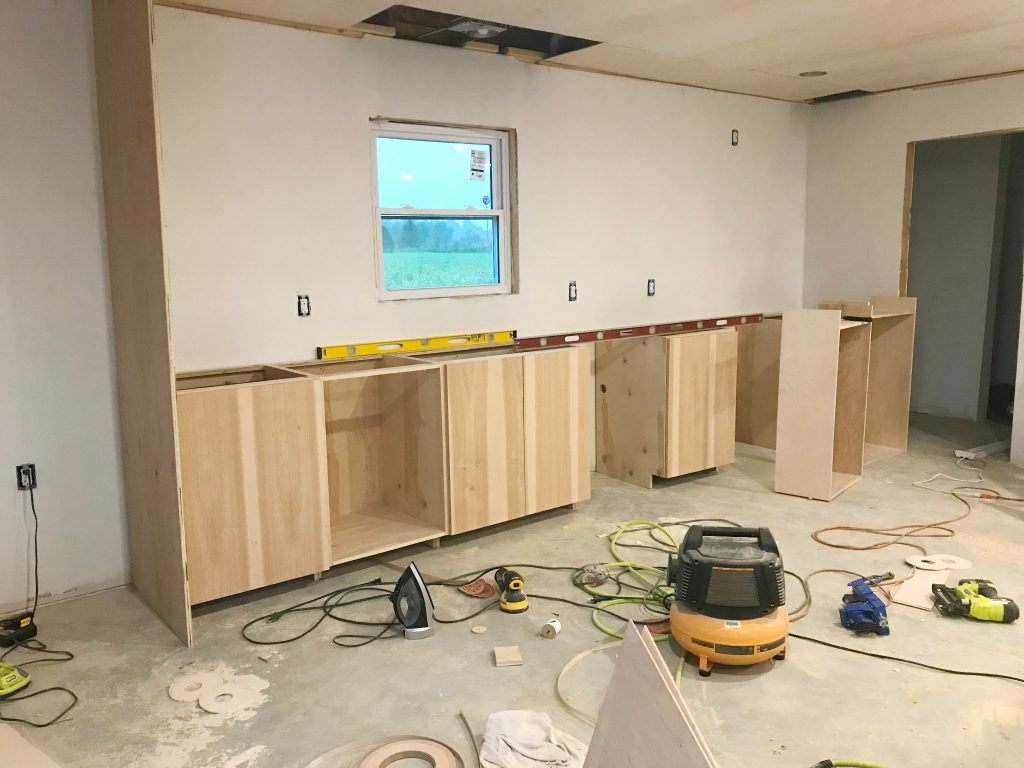
Assembling Cabinets
Assembling kitchen cabinets can be a fun and rewarding project. It allows you to have control over the final look and feel of your kitchen. Whether you are installing new cabinets or replacing old ones, assembling them yourself can save you money and provide a sense of accomplishment. Below is a step-by-step guide on how to assemble your kitchen cabinets, along with common mistakes to avoid.
Step-by-step Guide
- Unpack the Cabinets: Open the boxes carefully and lay out all pieces.
- Check the Instructions: Read the assembly manual provided. Make sure you understand each step.
- Gather Tools: Ensure you have all necessary tools. These include a screwdriver, hammer, and measuring tape.
- Start with the Base: Assemble the base of the cabinet first. Attach the sides, back, and bottom panels.
- Install Shelves: Insert the shelves according to the manual. Make sure they are level.
- Attach Doors: Fix the doors to the cabinet. Use hinges and screws provided.
- Finish with Handles: Attach handles or knobs to the doors. Ensure they are securely fastened.
Common Mistakes To Avoid
- Skipping the Manual: Always read the manual first. It provides specific instructions for your cabinet model.
- Using Wrong Tools: Ensure you use the correct tools. Wrong tools can damage the cabinet.
- Overtightening Screws: Tighten screws just enough. Overtightening can crack the wood.
- Ignoring Measurements: Measure twice, cut once. Incorrect measurements can lead to misalignment.
- Rushing the Process: Take your time. Rushing can result in mistakes.
Installing Cabinets
Installing kitchen cabinets yourself can be a satisfying project. With the right tools and knowledge, you can save money and achieve a professional look. This guide will help you with securing your cabinets to the walls and ensuring they are level and aligned.
Securing To Walls
First, locate the wall studs using a stud finder. Mark the stud locations with a pencil. This ensures your cabinets are securely attached.
- Hold the cabinet in place.
- Drill pilot holes through the cabinet’s back panel into the wall studs.
- Use screws to attach the cabinet to the wall.
Repeat these steps for each cabinet. Make sure each one is firmly secured to the studs. Use at least two screws per stud for a strong hold.
Ensuring Level And Alignment
Place a level on top of the cabinet. Adjust until the bubble is centered. Use shims under the cabinet if necessary.
- Check the alignment with adjacent cabinets.
- Use clamps to hold cabinets together.
- Drill pilot holes and use screws to join the cabinets.
Repeat this process for all cabinets. Ensuring each one is level and aligned will make your kitchen look great.
| Step | Description |
|---|---|
| 1 | Locate wall studs and mark them. |
| 2 | Drill pilot holes and attach cabinets to studs. |
| 3 | Check for level and adjust using shims. |
| 4 | Align cabinets and secure them together. |
By following these steps, your kitchen cabinets will be securely installed, level, and well-aligned. Enjoy your new kitchen space!
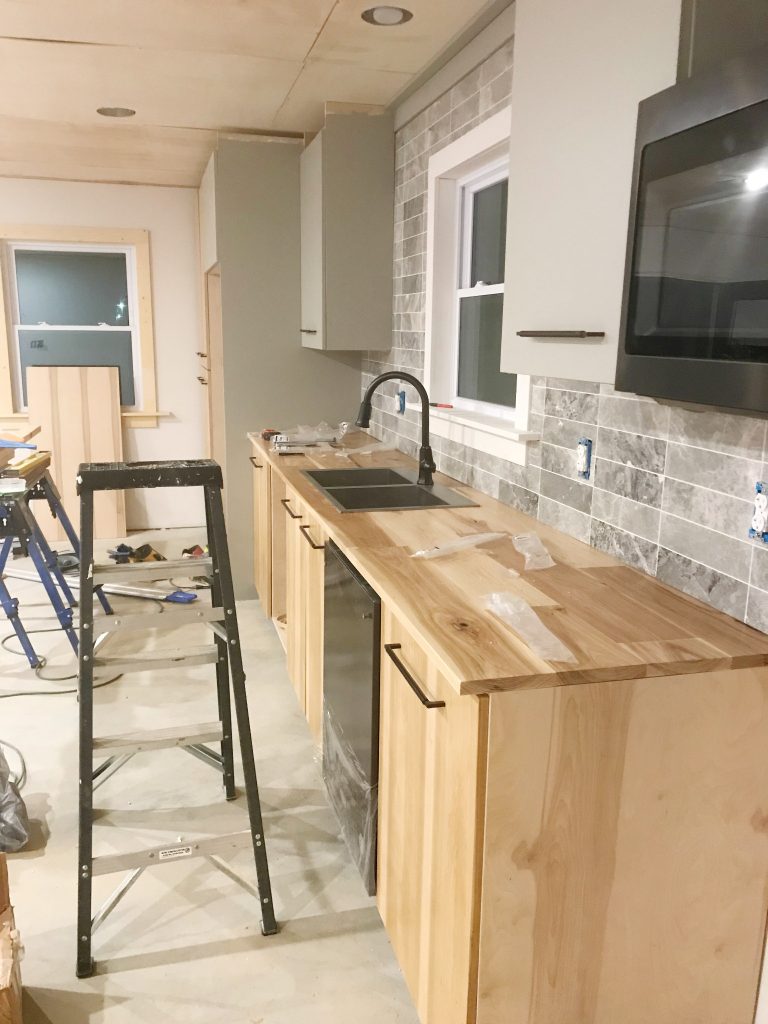
Finishing Touches
The finishing touches on your DIY kitchen cabinets make a huge impact. This phase transforms basic cabinets into personalized masterpieces. Focus on painting and staining, and adding hardware to achieve a polished look.
Painting And Staining
Choosing the right color or stain enhances your kitchen’s style. A fresh coat of paint can modernize old cabinets. Staining, on the other hand, showcases the natural beauty of wood.
Here are the steps to paint or stain your kitchen cabinets:
- Clean the cabinet surfaces thoroughly.
- Sand the cabinets to remove old paint or finish.
- Apply a primer if you are painting.
- Use a brush or roller for even application.
- Let the paint or stain dry completely.
- Apply a second coat if needed.
| Painting | Staining |
|---|---|
| Use latex or oil-based paint. | Choose a wood stain in your desired shade. |
| Primer is essential for better adhesion. | No primer needed, but sanding is crucial. |
| Multiple coats may be required. | Usually requires fewer coats. |
Adding Hardware
Hardware like knobs and handles can change your kitchen’s look. They add both functionality and style to your cabinets.
Follow these steps to add hardware to your kitchen cabinets:
- Choose hardware that matches your kitchen theme.
- Measure and mark the locations for the hardware.
- Drill holes at the marked spots.
- Screw in the knobs or handles securely.
Consider these types of hardware for a stylish finish:
- Knobs: Easy to install, perfect for doors.
- Handles: Great for drawers, offering a good grip.
- Pulls: Modern and sleek, ideal for a contemporary look.
Choose hardware finishes like brushed nickel, chrome, or antique brass. These finishes can complement your cabinet color and kitchen decor.
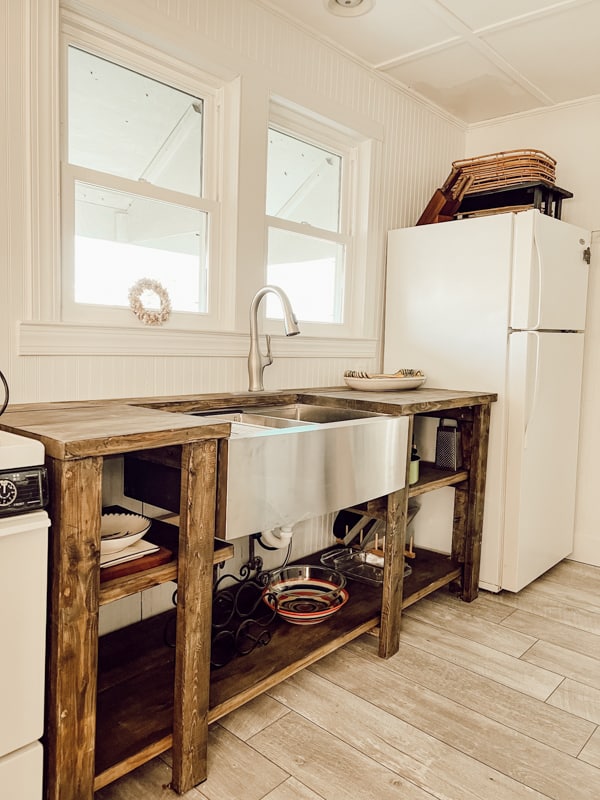
Maintaining Your Cabinets
Proper maintenance extends the life of your DIY kitchen cabinets. Well-maintained cabinets add beauty and value to your kitchen. Following a few simple steps ensures your cabinets look new for years.
Cleaning Tips
Regular cleaning prevents dirt buildup and keeps cabinets shining. Use a soft cloth to wipe away dust. For sticky spots, mix water and mild detergent. Avoid harsh chemicals that can damage the finish.
- Dust weekly with a microfiber cloth.
- Wipe spills immediately to prevent stains.
- Use a soft brush for grooves and corners.
For wooden cabinets, a solution of vinegar and water works well. Always dry the surface after cleaning to avoid water damage.
Repair And Upkeep
Regular upkeep keeps your cabinets looking their best. Fix small issues before they become big problems. Check hinges and handles periodically.
- Tighten loose screws on handles and knobs.
- Lubricate hinges to prevent squeaks.
- Touch up scratches with a matching wood marker.
Repairing dents or chips is simple with wood filler. Sand the area smooth and apply touch-up paint. For broken parts, refer to the original manufacturer for replacements.
| Problem | Solution |
|---|---|
| Loose handles | Tighten screws |
| Squeaky hinges | Apply lubricant |
| Scratches | Use wood marker |
Regular maintenance keeps your kitchen cabinets functional and beautiful. Follow these tips to enjoy your DIY cabinets for many years.
Frequently Asked Questions
How To Install Kitchen Cabinets Yourself?
Measure space, mark stud locations, level cabinets, secure to wall studs, attach doors and hardware.
What Tools Are Needed For Diy Cabinets?
You’ll need a drill, level, tape measure, screws, and a stud finder.
How To Paint Kitchen Cabinets At Home?
Remove doors, sand surfaces, apply primer, paint with a brush or sprayer, reattach doors.
Can I Refinish Cabinets Without Sanding?
Yes, use a deglosser or liquid sandpaper, then apply primer and paint.
How To Choose Cabinet Materials?
Consider durability, appearance, and budget. Popular options are plywood, MDF, and solid wood.
What Is The Cost Of Diy Cabinets?
Costs vary by materials and tools needed, generally ranging from $200 to $2,000.
How To Measure For New Cabinets?
Measure wall length, height, and depth. Account for appliances and ensure accurate measurements for fitting.
How To Remove Old Kitchen Cabinets?
Unscrew cabinet doors, detach from wall studs, and carefully remove cabinets to avoid damage.
How To Fix Crooked Cabinets?
Loosen screws, adjust cabinet position, use shims if necessary, then retighten screws.
Are Diy Cabinets Worth It?
Yes, they save money and can be customized to fit your space and style preferences.
Conclusion
Transforming your kitchen with DIY cabinets can be rewarding and budget-friendly. With careful planning and the right tools, you can achieve professional results. Remember to measure accurately and choose quality materials. Your dream kitchen is within reach. Happy renovating!

