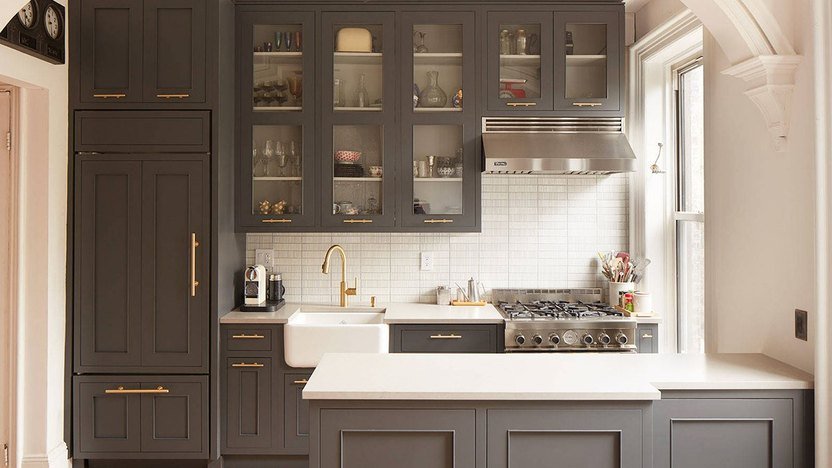
To make cheap cabinets look good, apply a fresh coat of paint and replace the hardware. Adding decorative molding also enhances their appearance.
Transforming cheap cabinets into stylish focal points doesn’t have to be expensive or complicated. With a bit of creativity and effort, you can make them look high-end and custom-made. Start by selecting a high-quality paint that complements your kitchen or bathroom decor.
Fresh paint can immediately change the look and feel of your cabinets. Next, replace the outdated hardware with modern handles and knobs. This simple change can make a significant impact. Consider adding decorative molding or trim to give the cabinets a custom-built look. These small yet effective upgrades can make a big difference, ensuring your cabinets look stylish and sophisticated without breaking the bank.
Choosing The Right Paint
Painting can change the look of cheap cabinets. The right paint can make them look new. Picking the right color and applying it well is key. Here’s how to do it.
Color Selection
Choosing the right color is important. Light colors can make a room look bigger. Dark colors give a rich and elegant look. Think about your room’s style and lighting. White and off-white are classic choices. Bold colors can add a modern touch. Remember, the color should match your home decor.
Application Tips
Applying paint the right way makes a big difference. Here are some tips:
- Clean the Cabinets: Remove dirt and grease with a mild cleaner.
- Sand the Surface: Lightly sand to create a smooth surface. This helps the paint stick better.
- Use Primer: Apply a coat of primer before painting. Primer helps cover stains and ensures even paint coverage.
- Choose the Right Brush: Use high-quality brushes or rollers. This ensures a smooth, even finish.
- Apply Thin Coats: Multiple thin coats are better than one thick coat. Let each coat dry before applying the next.
- Seal the Paint: Use a clear sealant to protect the paint. This makes the cabinets more durable and easier to clean.
Below is a table summarizing the key steps:
| Step | Description |
|---|---|
| Clean | Remove all dirt and grease. |
| Sand | Smooth the surface lightly. |
| Prime | Apply a coat of primer. |
| Paint | Use thin coats of paint. |
| Seal | Protect with a clear sealant. |
These steps can make cheap cabinets look great. Choosing the right paint and applying it well is key. Follow these tips for a fresh and stylish look.

Credit: m.youtube.com
Replacing Cabinet Hardware
Replacing cabinet hardware is a cost-effective way to give your cabinets a fresh look. By changing the knobs and handles, you can transform the appearance of your kitchen or bathroom. This simple upgrade can make even the cheapest cabinets look stylish and modern.
Choosing New Knobs And Handles
Start by selecting new knobs and handles that match your style. There are many affordable options available in various designs and finishes.
- Material: Choose between metal, ceramic, wood, or plastic.
- Style: Modern, vintage, rustic, or classic.
- Finish: Matte, glossy, brushed, or polished.
Ensure the new hardware complements your kitchen or bathroom theme. If your space has a modern look, opt for sleek, minimalist designs. For a rustic feel, choose distressed or antique finishes.
Installation Guide
Installing new cabinet hardware is a straightforward task. Follow these simple steps:
- Remove Old Hardware: Use a screwdriver to take off the existing knobs or handles.
- Measure Hole Distance: Measure the distance between the screw holes if replacing handles.
- Mark Drill Points: Use a pencil to mark where you need to drill new holes.
- Drill New Holes: Carefully drill the new holes, ensuring they are straight.
- Attach New Hardware: Screw in the new knobs or handles using a screwdriver.
For an easier installation, follow these tips:
- Use a template to ensure consistent hole placement.
- Double-check measurements before drilling new holes.
- Work slowly to avoid damaging the cabinet surface.
| Task | Tools Needed |
|---|---|
| Remove Old Hardware | Screwdriver |
| Measure Hole Distance | Tape Measure |
| Mark Drill Points | Pencil |
| Drill New Holes | Drill |
| Attach New Hardware | Screwdriver |
With these steps, you can easily upgrade your cabinet hardware. Your cabinets will look beautiful and refreshed.
Adding Trim And Molding
Adding trim and molding can transform your cheap cabinets into stunning pieces. This simple upgrade adds depth and elegance. You don’t need to break the bank for a high-end look. Just follow these steps for a budget-friendly makeover.
Selecting Trim Styles
The right trim style is crucial. Choose trim that matches your home’s decor. For a modern look, go for sleek, straight lines. For a classic vibe, opt for ornate and detailed molding. Here are some popular styles:
- Shaker: Simple and clean lines.
- Colonial: Elegant curves and details.
- Craftsman: Strong, straight lines.
- Victorian: Intricate and decorative.
Diy Installation Steps
Installing trim and molding is easier than you think. Follow these steps to give your cabinets a new look.
- Measure: Measure the dimensions of your cabinets.
- Cut: Use a saw to cut the trim pieces to size.
- Attach: Use wood glue and finishing nails to secure the trim.
- Fill: Fill any gaps or holes with wood filler.
- Sand: Sand the trim for a smooth finish.
- Paint: Paint the trim to match or contrast with your cabinets.
Here’s a simple table to help you with common tools needed:
| Tool | Purpose |
|---|---|
| Measuring Tape | Measure trim length |
| Saw | Cut trim to size |
| Wood Glue | Attach trim pieces |
| Finishing Nails | Secure trim |
| Wood Filler | Fill gaps and holes |
| Sandpaper | Smooth trim |
| Paint | Finish the look |
With these steps, you can easily upgrade your cabinets. Adding trim and molding is a cost-effective way to make cheap cabinets look good.
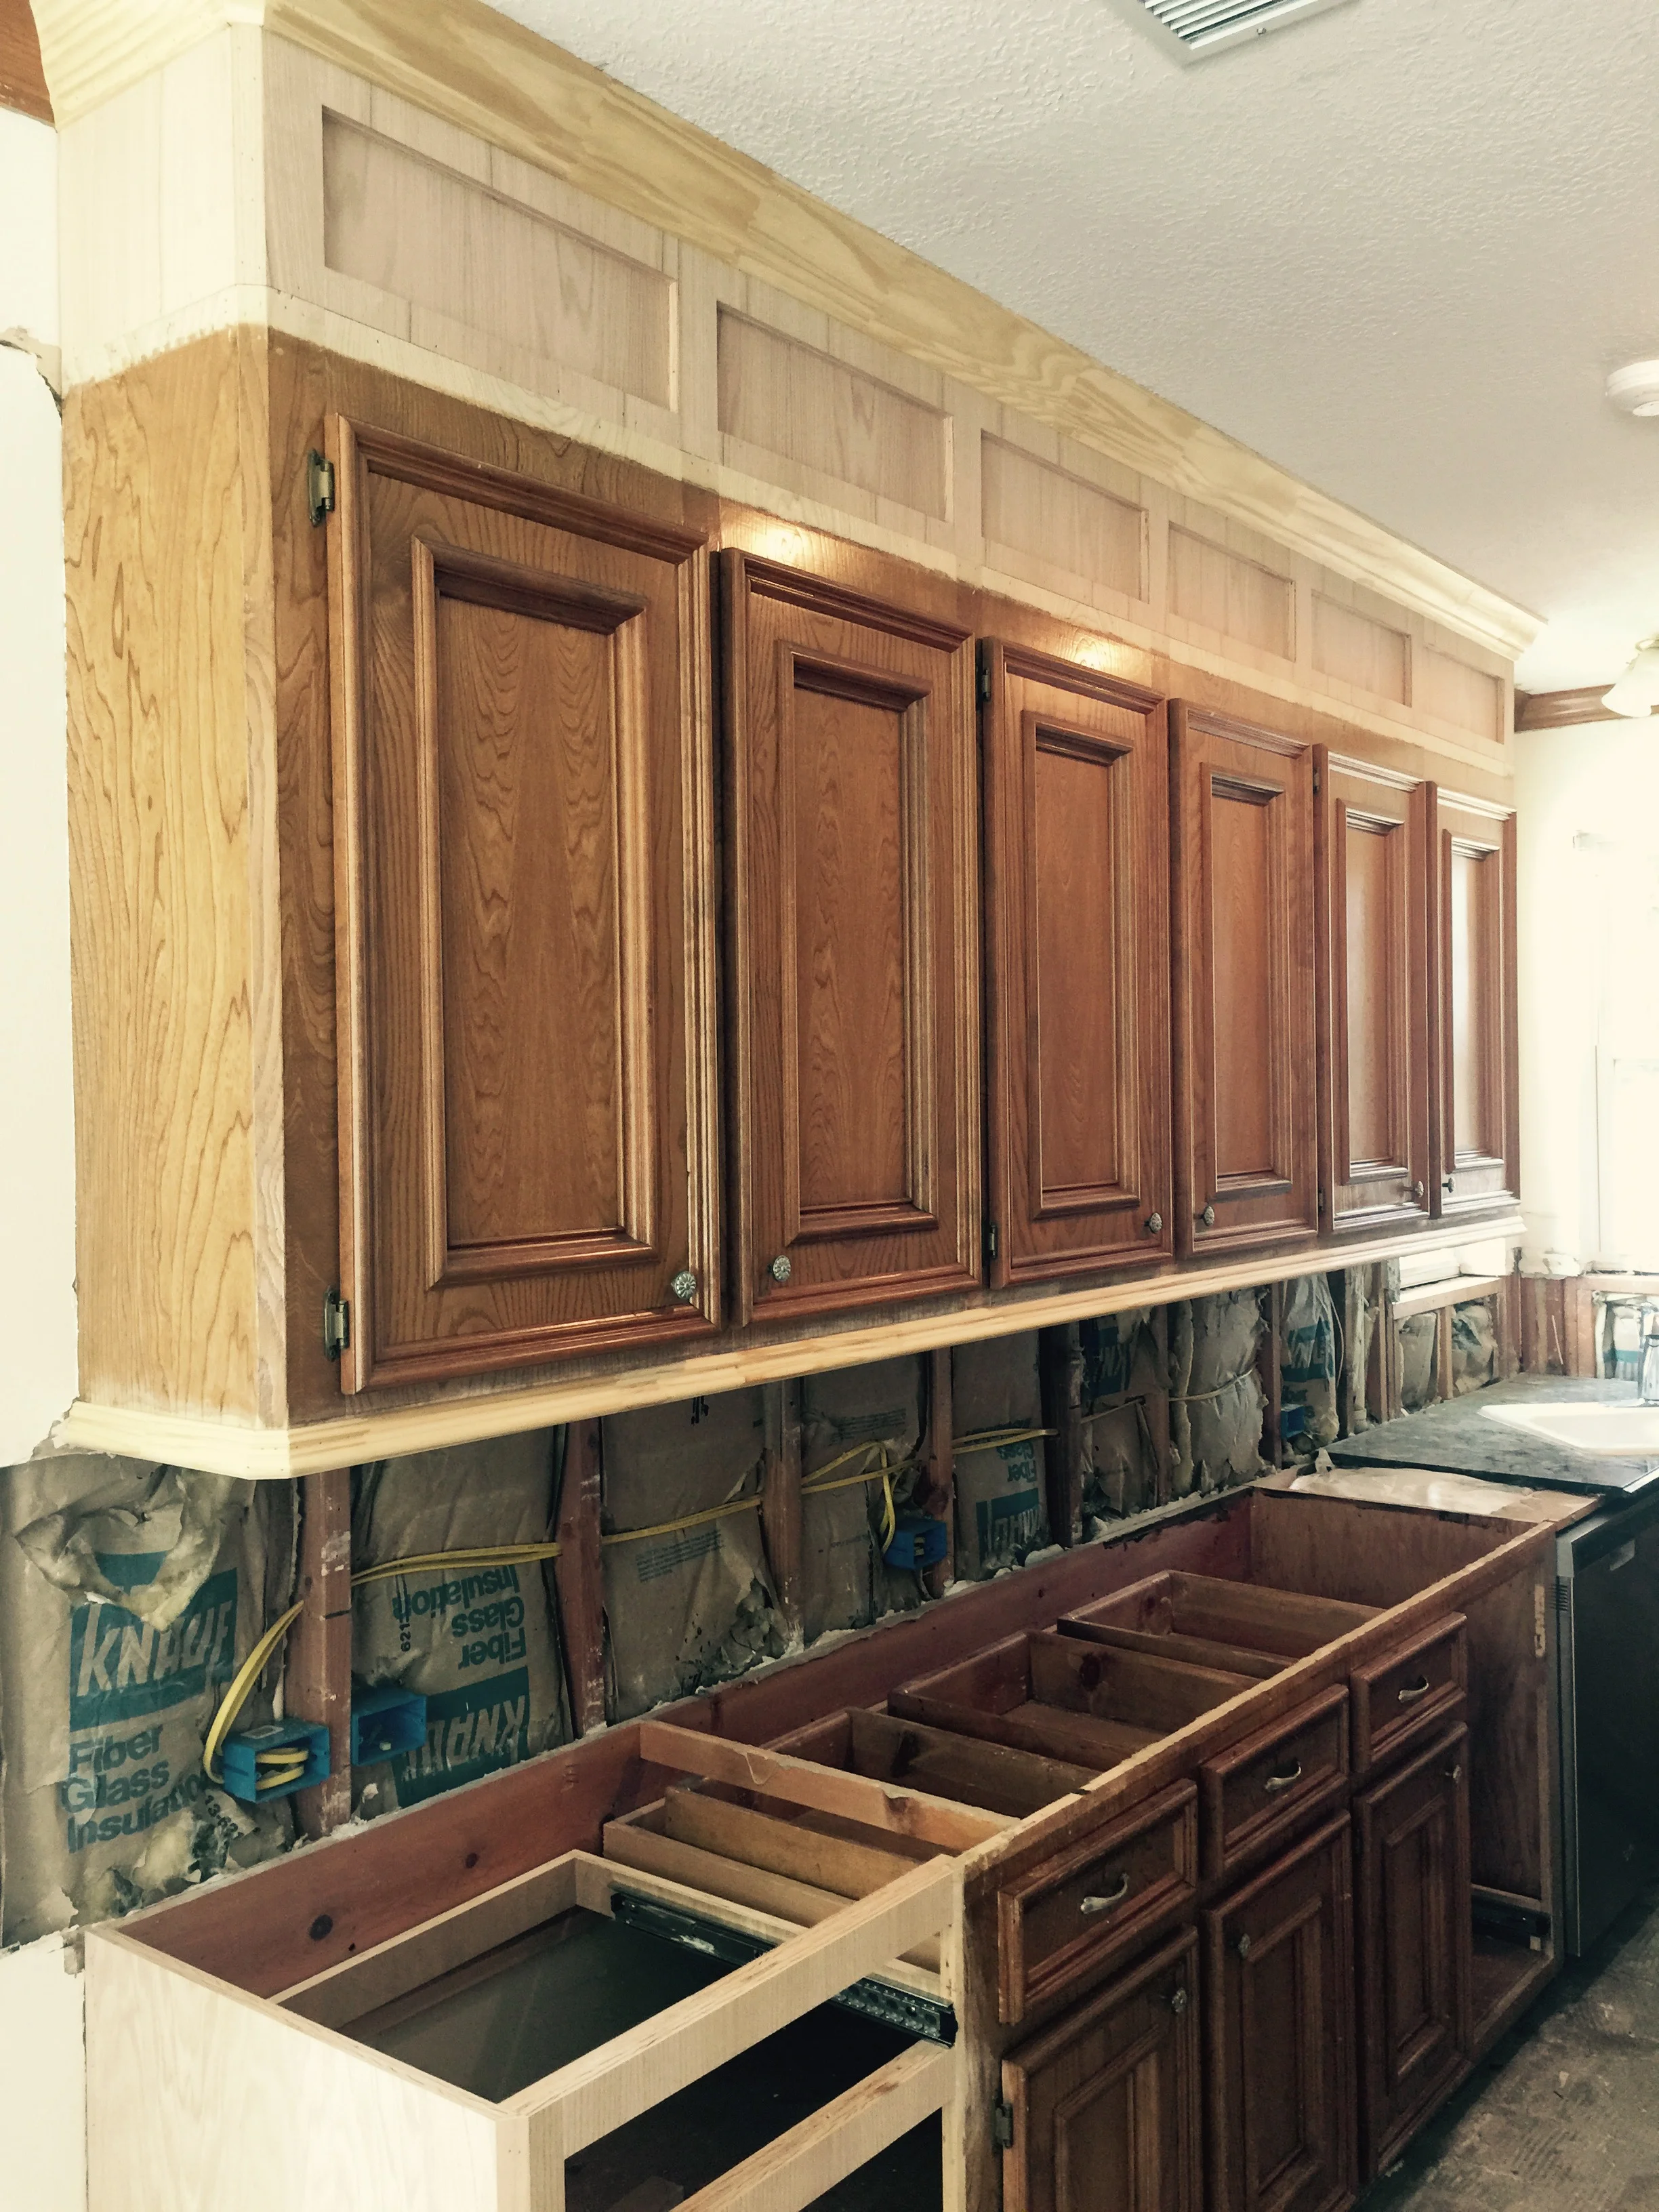
Credit: carlaaston.com
Using Contact Paper
Revamping your cabinets can be affordable and straightforward with contact paper. This versatile material can transform old cabinets into stylish storage spaces. Contact paper offers a wide range of patterns and easy application steps.
Pattern Options
Contact paper comes in many patterns and colors. You can choose from wood grain, marble, or even geometric designs. Wood grain patterns can give your cabinets a rustic look. Marble patterns add a touch of elegance. Geometric designs can make your kitchen look modern.
Think about your kitchen’s overall style. Pick a pattern that complements it. A well-chosen pattern can make cheap cabinets look expensive. Here are some popular pattern options:
- Wood Grain: Oak, Cherry, Pine
- Marble: White, Black, Gray
- Geometric: Hexagons, Triangles, Circles
Application Process
Applying contact paper is simple and quick. Follow these steps to ensure a smooth finish:
- Clean the Surface: Wipe down the cabinets with a damp cloth. Let them dry completely.
- Measure and Cut: Measure the cabinet surfaces. Cut the contact paper to the correct size. Leave a little extra paper on the edges.
- Peel and Stick: Start at one corner. Peel off the backing slowly. Stick the paper to the surface. Smooth out any bubbles with a squeegee or credit card.
- Trim the Edges: Use a sharp blade to trim any excess paper. Be careful not to scratch the cabinet.
These steps will help you achieve a professional look. Your cabinets will look brand new with minimal effort and cost.
Installing Under-cabinet Lighting
Installing under-cabinet lighting can transform the look of your cheap cabinets. It adds a touch of elegance and enhances functionality. The right lighting can make a huge difference in your kitchen’s ambiance and usability. Let’s explore the types of lighting and installation tips to help you get started.
Types Of Lighting
There are several types of under-cabinet lighting options to choose from:
- LED Strip Lights: These are energy-efficient and come in various colors.
- Puck Lights: These are small, round lights that create focused beams.
- Fluorescent Lights: These provide a bright, even light and are budget-friendly.
- Rope Lights: These are flexible and great for decorative purposes.
Installation Tips
Follow these tips to ensure a smooth installation:
- Plan the Layout: Measure the space under your cabinets.
- Choose the Right Lights: Pick lights that match your needs and style.
- Prepare the Surface: Clean the area where you will install the lights.
- Mounting: Use adhesive strips or screws to secure the lights.
- Wiring: Conceal the wires for a tidy look. Use cable clips or channels.
- Test the Lights: Turn on the lights to ensure they work properly.
By installing under-cabinet lighting, you can make your cheap cabinets look stunning and functional. The right lighting not only enhances the appearance but also improves the kitchen’s overall ambiance.
Incorporating Open Shelving
Open shelving can transform your cheap cabinets. It adds style and function. Open shelves are easy to install and affordable. They create a light and airy feel in your kitchen. Let’s dive into how you can make the most of open shelving.
Choosing Shelves
Picking the right shelves is crucial. Wooden shelves bring warmth and natural beauty. Metal shelves add a sleek, modern look. You can even use glass shelves for a minimalist style.
Think about the color and finish. White shelves look clean and bright. Dark shelves can add drama and contrast. Choose the one that matches your kitchen theme.
| Material | Style |
|---|---|
| Wood | Warm and Natural |
| Metal | Sleek and Modern |
| Glass | Minimalist |
Installation Tips
Proper installation ensures your shelves are secure. Measure the space where you want to install the shelves. This helps you get the right size.
Use a level tool to make sure your shelves are straight. This prevents items from sliding off. Choose heavy-duty brackets for better support.
- Measure the space
- Use a level tool
- Choose heavy-duty brackets
Once installed, place your items carefully. Balance the weight to prevent shelves from tipping. Arrange items by height and color for a neat look.
Updating Cabinet Doors
Updating cabinet doors is a great way to make cheap cabinets look good. You can change the look with simple techniques. These methods don’t need a lot of money.
Refacing Techniques
Refacing is a quick fix for old cabinets. It means covering the old doors with a new layer. This makes them look new without replacing them. Use veneer or laminate for this. They come in many colors and styles.
- Clean the doors first.
- Sand them lightly.
- Apply the new veneer or laminate.
- Trim the edges for a clean look.
| Material | Cost | Durability |
|---|---|---|
| Veneer | Low | High |
| Laminate | Medium | Medium |
Painting And Staining
Painting your cabinet doors is another easy method. Choose a color that matches your kitchen. Clean the doors well before painting. Use a primer to help the paint stick. Apply two coats of paint for best results.
- Remove the doors from the cabinets.
- Clean them with soap and water.
- Sand lightly to remove old paint.
- Apply primer and let it dry.
- Paint the doors with your chosen color.
Staining is good for a natural wood look. Stains come in many shades. Clean and sand the doors before applying stain. Use a brush or cloth for a smooth finish.
- Choose the right shade of stain.
- Apply with a brush or cloth.
- Let it dry completely.
- Apply a sealant for protection.
Credit: www.reddit.com
Adding Decorative Elements
Revamping your cabinets doesn’t require a hefty budget. By adding decorative elements, you can transform cheap cabinets into stylish focal points. Below are some effective strategies to achieve this.
Choosing Decorative Accessories
Selecting the right accessories can significantly impact the overall look. Consider these options:
- Handles and Knobs: Opt for unique handles and knobs. They add personality.
- Trim and Molding: Add trim or molding for a sophisticated touch.
- Stickers and Decals: Use stickers or decals for a playful and colorful effect.
- Glass Inserts: Replace wooden panels with glass inserts. It creates a modern look.
Placement Ideas
Strategic placement of decorative elements enhances their effect. Here are some ideas:
- On the Doors: Place decorative handles in the center or corners.
- Along the Edges: Add trim or molding along the edges.
- Inside Panels: Apply decals or stickers on the inner panels.
- On the Shelves: Use glass inserts for open shelves. It creates depth.
Below is a quick reference table for selecting and placing accessories:
| Accessory | Placement |
|---|---|
| Handles and Knobs | Doors, Drawers |
| Trim and Molding | Edges, Corners |
| Stickers and Decals | Inner Panels, Doors |
| Glass Inserts | Doors, Shelves |
Frequently Asked Questions
How Can I Improve Cheap Cabinet Appearance?
Paint them in bold colors or neutral tones.
What Are Budget-friendly Cabinet Makeover Ideas?
Use contact paper or adhesive vinyl for a fresh look.
How To Make Cheap Cabinets Look Modern?
Update hardware with stylish handles and knobs.
Can Lighting Enhance Cheap Cabinets?
Yes, under-cabinet lighting adds elegance.
What Paint Is Best For Cheap Cabinets?
Semi-gloss or satin finish offers durability and shine.
How To Add Style To Cabinet Doors?
Install glass inserts or decorative molding.
Are Peel-and-stick Tiles Effective?
Yes, they offer a quick and affordable upgrade.
Can I Use Wallpaper On Cabinets?
Yes, it adds pattern and texture easily.
What’s A Quick Fix For Cabinet Interiors?
Line them with colorful or patterned shelf liners.
How To Clean Old Cabinets For A Fresh Look?
Use a degreaser and microfiber cloth for best results.
Conclusion
Transforming cheap cabinets can be simple and budget-friendly. A fresh coat of paint works wonders. Add stylish hardware for a modern touch. Use creative storage solutions to maximize space. With these tips, your cabinets will look elegant without breaking the bank.
Enjoy your upgraded kitchen!

