To fix kitchen cabinets to the wall, locate studs using a stud finder and secure cabinets with screws. Ensure alignment and level before tightening.
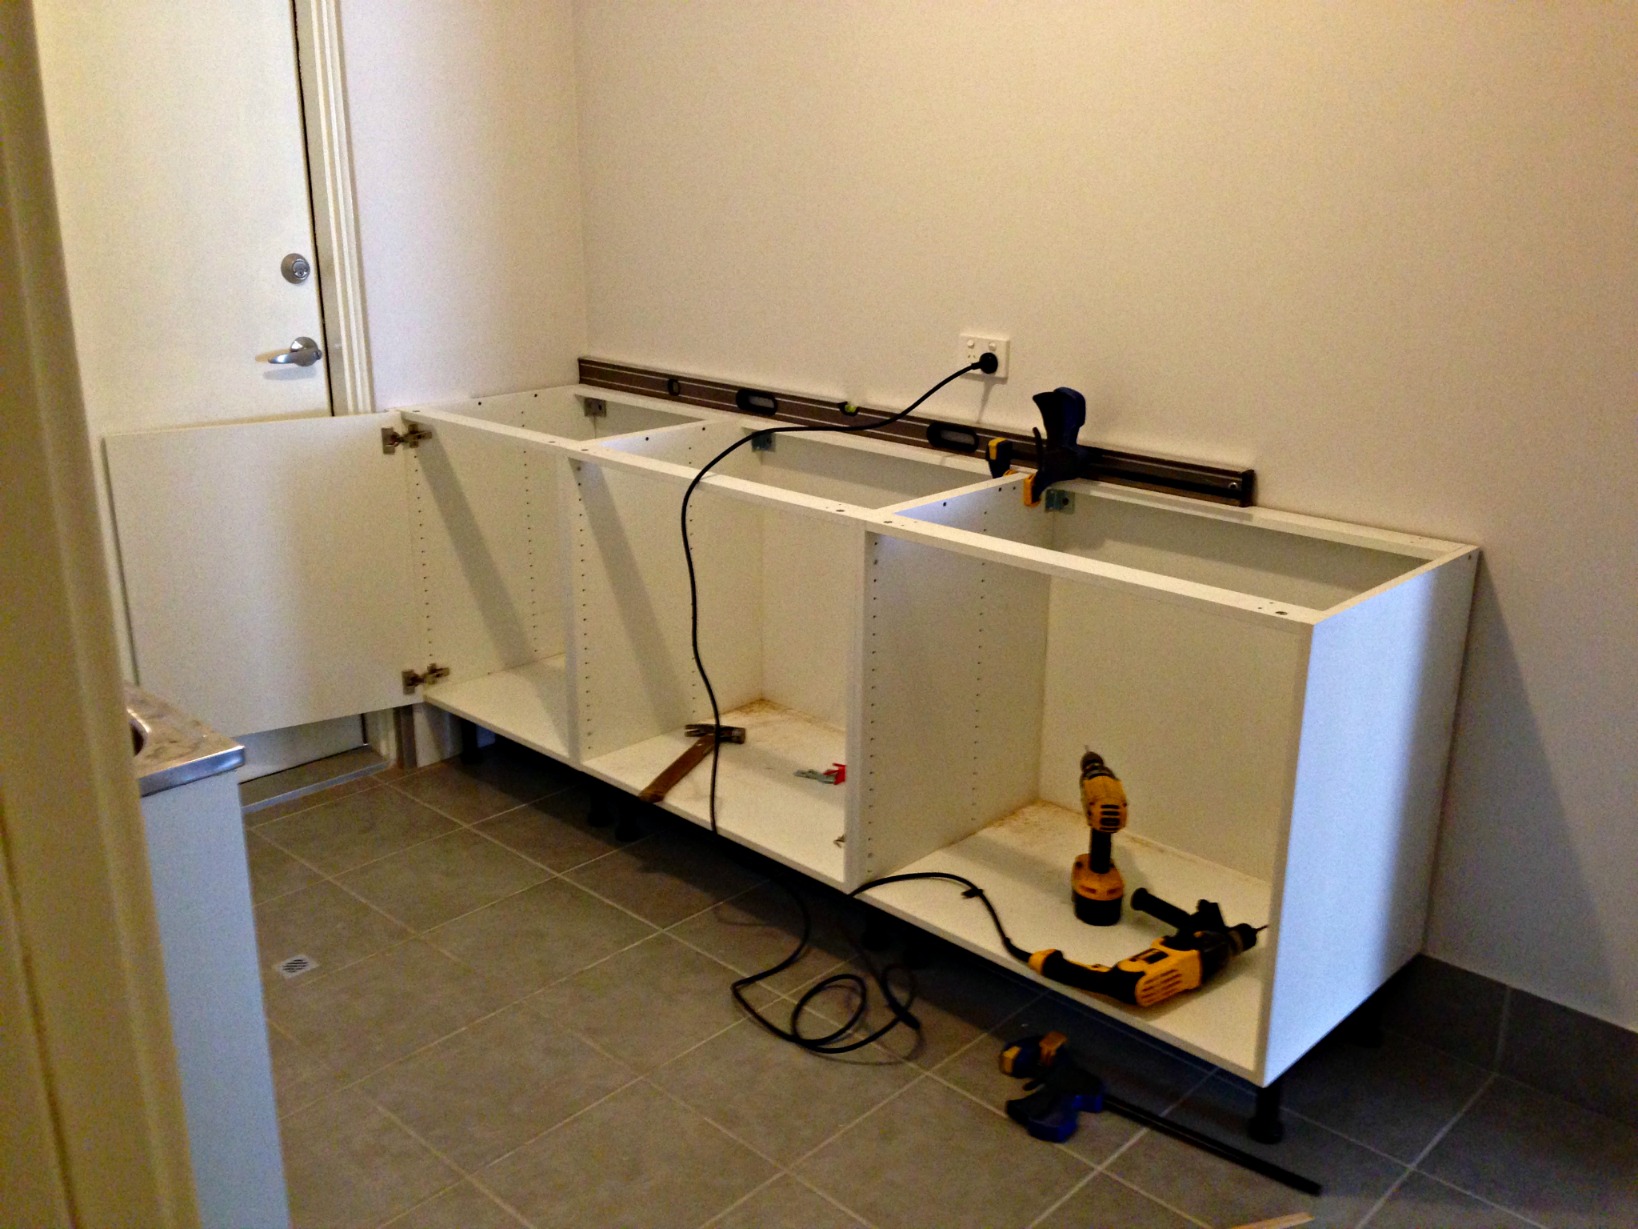
Securing kitchen cabinets to the wall is crucial for safety and functionality. Proper installation prevents accidents and ensures durability. First, gather necessary tools like a stud finder, level, drill, and screws. Identify the wall studs, as they provide the strongest support for your cabinets.
Mark the stud locations with a pencil. Align the cabinets and ensure they are level before drilling pilot holes. Use screws to attach the cabinets firmly to the studs. Double-check the alignment and make any necessary adjustments. Properly installed cabinets enhance kitchen organization and aesthetics, making your space more efficient and visually appealing.

Preparation
Preparation is crucial before fixing kitchen cabinets to the wall. Proper preparation ensures a smooth installation process and long-lasting results. This section guides you through the essential steps for preparation.
Gather Tools
Before starting the installation, gather all the necessary tools. Having everything ready saves time and avoids interruptions.
- Drill and Bits: For drilling holes and driving screws.
- Stud Finder: Locates the studs in your wall.
- Level: Ensures your cabinets are even.
- Measuring Tape: For accurate measurements.
- Pencil: Marks the spots for drilling.
- Screwdriver: Tightens screws securely.
- Clamps: Holds cabinets in place during installation.
Clear The Area
Before you start, ensure the workspace is clean and clear. This step prevents accidents and makes the installation process easier.
- Remove all items from the counters and shelves.
- Clear the floor space around the installation area.
- Move any furniture that might be in the way.
- Ensure the wall surface is clean and free of debris.
A clean, clutter-free area allows you to work efficiently. It also helps you focus on the task at hand.
Measure And Mark
Getting your kitchen cabinets secured to the wall starts with precise measurement and marking. This step is crucial for ensuring the cabinets are level and securely fastened. Let’s break down the process into actionable steps.
Locate Studs
Begin by finding the wall studs. Studs provide the support needed to hold the cabinets securely.
- Use a stud finder to locate studs behind the drywall.
- Mark each stud’s position with a pencil.
- Ensure marks are clear and visible.
It’s essential to mount cabinets into studs. This ensures they can handle the weight of dishes and cookware.
Mark Cabinet Positions
Next, you need to mark the positions where the cabinets will be installed.
- Measure the height of the cabinets.
- Mark a horizontal line on the wall where the top of the cabinet will be.
- Use a level to ensure the line is straight.
- Mark the bottom line of the cabinet.
These markings will guide you in mounting the cabinets properly.
| Step | Action | Tools Needed |
|---|---|---|
| 1 | Locate studs | Stud finder, Pencil |
| 2 | Mark top line of cabinet | Measuring tape, Pencil, Level |
| 3 | Mark bottom line of cabinet | Measuring tape, Pencil |
Following these steps ensures your cabinets are installed correctly and securely. Proper measurement and marking are key to a successful kitchen remodel.
Drill Pilot Holes
Drilling pilot holes is crucial when fixing kitchen cabinets to the wall. It prevents wood from splitting and ensures screws fit snugly. Follow these steps for a seamless installation.
Mark Drill Points
First, mark the spots where you need to drill. Use a pencil and a measuring tape for accuracy. Ensure the marks are level and aligned with wall studs.
- Measure the height of the cabinet.
- Use a stud finder to locate wall studs.
- Mark the drill points on the cabinet and the wall.
Precise marking is essential for a secure fit.
Use Appropriate Drill Bit
Choose the right drill bit for your cabinet and wall type. A standard twist bit works for most wood cabinets. Use a masonry bit for brick walls.
| Material | Recommended Drill Bit |
|---|---|
| Wood | Twist Bit |
| Brick | Masonry Bit |
| Metal | High-Speed Steel Bit |
Match the drill bit size to your screws. The pilot hole should be slightly smaller than the screw diameter. This ensures a tight fit and prevents splitting.
By following these steps, your kitchen cabinets will be securely fixed to the wall. Proper drilling of pilot holes is vital for a sturdy and lasting installation.
Install Mounting Brackets
Fixing kitchen cabinets to the wall requires precision. The first step is to install mounting brackets. This ensures your cabinets stay in place and hold weight securely. Follow these steps to get the job done right.
Secure Brackets
To begin, you’ll need to secure the brackets. Choose strong, metal brackets for durability. Use a measuring tape to mark the wall where the brackets will go.
- Ensure the marks align with the studs in the wall.
- Drill pilot holes into the marked spots.
- Use screws to attach the brackets to the wall.
Tip: Use a level to ensure the brackets are straight.
Check Alignment
After securing the brackets, check their alignment. This step ensures your cabinets will be level.
- Place a level across the brackets.
- Adjust the brackets if needed.
- Re-tighten the screws to secure the brackets.
Ensuring proper alignment prevents crooked cabinets. This small step makes a big difference in the final look.
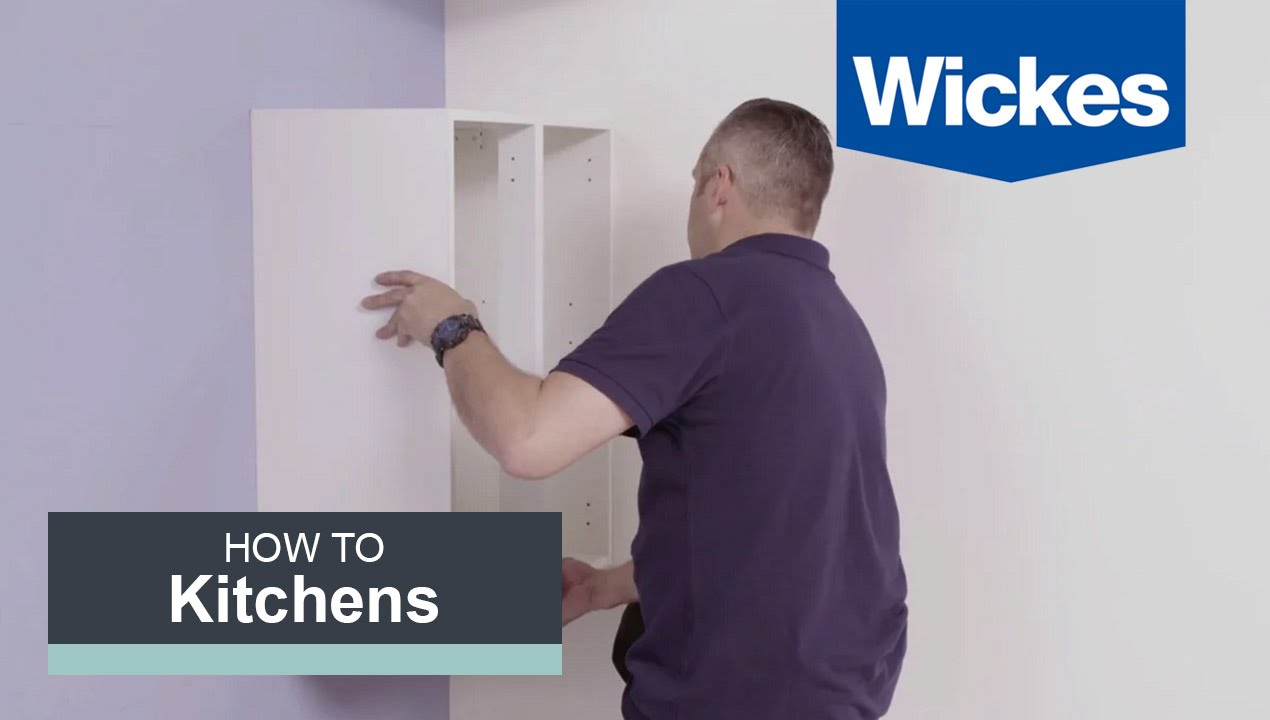
Attach Cabinets
Attaching kitchen cabinets to the wall can be simple. This guide will help you secure your cabinets effectively. Follow these easy steps to ensure your kitchen cabinets are safely attached and perfectly aligned.
Lift Cabinets
First, lift the cabinets into place. Use a helper if needed. Ensure the cabinets are level. A laser level can help with this.
Mark the wall where the top of the cabinet will go. Use a pencil for this. It will guide you in the next steps.
Pro Tip: Use a ledger board. It supports the cabinets while you screw them in. Attach this board under the line you marked earlier.
Secure To Wall
Now, it’s time to secure the cabinets to the wall. Start by drilling pilot holes through the cabinet back. Make sure the holes align with the wall studs.
Use 3-inch screws to attach the cabinets. Drive the screws through the cabinet back and into the studs. This ensures a strong hold.
Continue this process for each cabinet. Work from one end of the row to the other. Check for level and plumb as you go.
For a quick reference, here’s a simple table:
| Step | Action | Tools Needed |
|---|---|---|
| 1 | Lift Cabinets | Helper, Laser Level |
| 2 | Mark Wall | Pencil |
| 3 | Attach Ledger Board | Drill, Screws |
| 4 | Secure to Wall | Drill, 3-inch Screws |
By following these steps, you can attach your kitchen cabinets easily and securely.
Level Cabinets
Ensuring your kitchen cabinets are level is essential. It keeps your kitchen looking neat and functional. Follow these steps to check and adjust your cabinet’s alignment.
Check Alignment
First, use a spirit level to check the alignment. Place the level on top of the cabinets. The bubble should be centered. If not, your cabinets are not level.
Next, check the alignment from side to side. Place the level horizontally across the width. Ensure the bubble is centered here too.
If you have multiple cabinets, align them all. Use a long level or a straightedge for consistency.
Adjust If Necessary
If the cabinets are not level, you need to adjust them. Start by loosening the screws that attach the cabinets to the wall. This allows you to make necessary adjustments.
Use shims to level the cabinets. Place them under the cabinet base or between the cabinet and wall. Adjust until the bubble on the level is centered.
Tighten the screws once the cabinets are level. Ensure you do not overtighten as it may damage the cabinets.
Recheck the alignment after tightening. Make further adjustments if needed.
Secure Cabinets Together
Securing your kitchen cabinets together is a vital step. It ensures a stable and professional look. Properly aligning and fastening the cabinets will make your kitchen remodel last longer. Follow these steps to achieve a seamless and sturdy setup.
Clamp Cabinets
Before you start drilling, clamp the cabinets together. This helps to hold them in place. Use bar clamps for this task. Position the clamps at the top and bottom. Make sure the fronts are flush.
Check the alignment before tightening the clamps. If needed, adjust the cabinets. A perfect alignment means no gaps. Clamps make this task easier and more accurate.
Install Screws
Once clamped, it’s time to install screws. Use a drill and wood screws. Place the screws inside the cabinets. This hides the screw heads and creates a clean look.
Drill pilot holes first. This prevents the wood from splitting. Use two screws for each joint. Place one screw at the top and one at the bottom. This ensures a strong connection.
Check the alignment again after installing the screws. Make any final adjustments if needed. Properly installed screws will keep your cabinets secure and aligned.
| Tool | Purpose |
|---|---|
| Bar Clamps | Hold cabinets in place |
| Drill | Install screws |
| Wood Screws | Secure cabinets together |
| Level | Ensure alignment |
Follow these steps to secure your kitchen cabinets together. Proper clamping and screw installation are essential. This ensures a professional and durable finish in your kitchen.
Finish And Inspect
After securing your kitchen cabinets to the wall, it’s time to finish and inspect. This final step ensures everything is safe and looks perfect. Follow these steps to complete your kitchen cabinet installation.
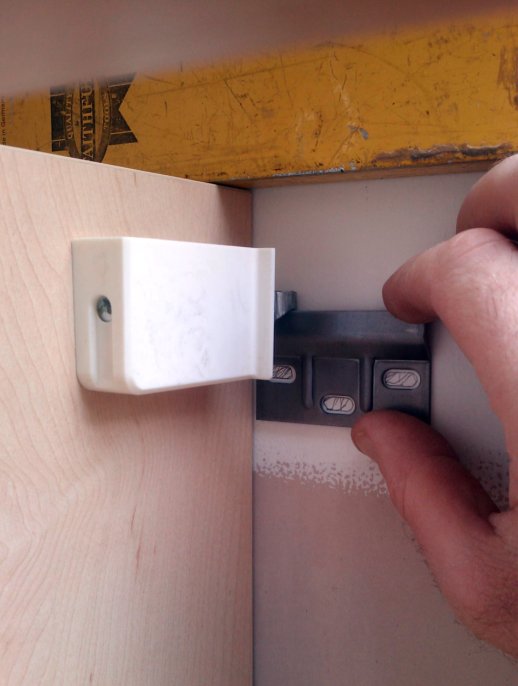
Install Doors
Start by attaching the cabinet doors. Align the hinges with the pre-drilled holes on the cabinet frame. Use a screwdriver to secure the hinges in place. Make sure the doors open and close smoothly. Adjust the hinges if the doors are misaligned. This ensures a perfect fit.
Next, attach the door handles or knobs. Measure the placement carefully. Mark the spots with a pencil. Drill holes where you marked. Insert and tighten the screws to secure the handles or knobs. Repeat this process for all cabinet doors.
Final Inspection
Perform a thorough inspection. Check each cabinet for stability. Ensure they are firmly attached to the wall. Open and close all doors to check for proper alignment. Verify that all hardware is secure.
Check the cabinet’s finish. Look for any scratches or dents. Use a touch-up pen or paint to fix minor damages. Ensure the cabinets look pristine.
Verify that the cabinets are level. Use a spirit level for accuracy. Adjust if necessary. Ensure there are no gaps between the cabinets and the wall. Fill any gaps with caulk.
| Checklist | Status |
|---|---|
| Doors aligned and secure |  |
| Handles/knobs attached | |
| Cabinets stable and level | |
| No visible damage | |
| Gaps filled | |
Completing these steps ensures your kitchen cabinets are secure and look great. Happy cooking!
Frequently Asked Questions
How To Securely Fix Kitchen Cabinets To Wall?
Use wall studs, brackets, and screws. Ensure cabinets are level and firmly anchored.
What Tools Are Needed To Fix Cabinets?
You need a drill, screws, stud finder, level, and brackets.
How To Find Wall Studs For Cabinets?
Use a stud finder and mark stud locations on the wall.
Can Kitchen Cabinets Be Fixed To Drywall?
Yes, but you must use anchors or attach to wall studs for stability.
How To Ensure Cabinets Are Level?
Use a spirit level and adjust as needed before securing the cabinets.
What Type Of Screws For Cabinet Installation?
Use wood screws, preferably 2. 5 to 3 inches long, for secure attachment.
How To Attach Brackets To Kitchen Cabinets?
Secure brackets to cabinet corners and then to wall studs with screws.
Do I Need Help To Fix Cabinets?
It’s easier with help to hold and align cabinets during installation.
How Much Weight Can Wall Cabinets Hold?
Depends on installation; properly fixed cabinets can hold around 50-70 pounds per linear foot.
How To Fix Cabinets To A Concrete Wall?
Use concrete screws or anchors, and a hammer drill to make holes.
Conclusion
Securing kitchen cabinets to the wall is essential for safety and functionality. Follow our step-by-step guide for a hassle-free installation. Properly fixed cabinets enhance your kitchen’s look and stability. Remember, patience and precision are key. Happy renovating and enjoy your upgraded kitchen space!

