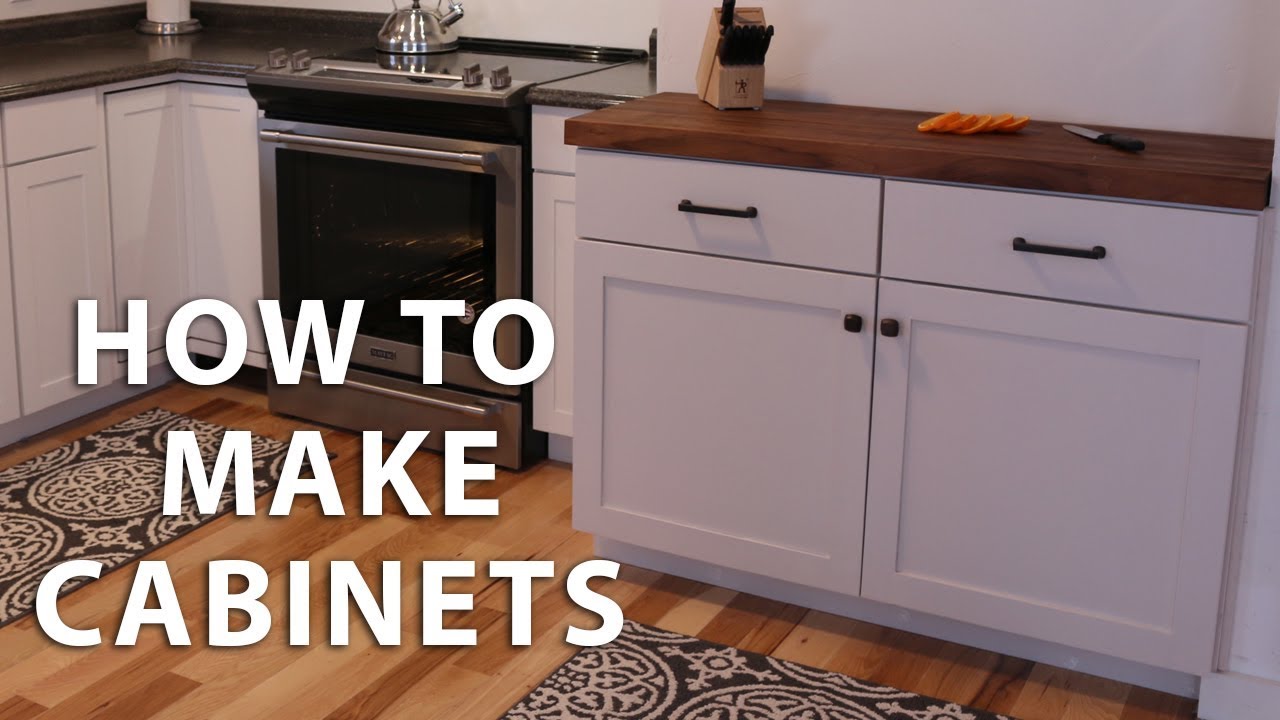
To build your own kitchen cabinets, gather materials and tools, then measure and cut wood for the frame and panels. Assemble, sand, and finish the cabinets.
Building your own kitchen cabinets can be a rewarding and cost-effective project. With the right materials and tools, you can create custom cabinets tailored to your kitchen’s dimensions and style. Start by gathering plywood, screws, hinges, and handles. Measure your space accurately to ensure a perfect fit.
Cut the wood for the frame and panels, then assemble using screws and wood glue. Sand all surfaces for smoothness. Finish with paint or stain for a polished look. This process not only saves money but also provides a sense of accomplishment. Enjoy the satisfaction of a beautifully crafted kitchen cabinet made with your own hands.
Introduction To Diy Kitchen Cabinets
Building your own kitchen cabinets can be a rewarding project. It saves money and allows you to customize your kitchen. You will learn new skills and create something unique. This guide will take you through the process step by step.
Benefits Of Building Your Own
There are many benefits to building your own kitchen cabinets:
- Cost Savings: Store-bought cabinets can be expensive. DIY cabinets cost less.
- Customization: You can choose your design, size, and materials.
- Learning Experience: Gain valuable skills in woodworking and design.
- Quality Control: Ensure every detail meets your standards.
- Personal Satisfaction: Enjoy the pride of creating something with your own hands.
Tools And Materials Needed
Before starting, gather the necessary tools and materials:
| Tools | Materials |
|---|---|
| Saw | Wood |
| Drill | Screws |
| Measuring Tape | Glue |
| Clamps | Hinges |
| Level | Paint or Stain |
Having the right tools and materials is essential. Ensure you have everything before you begin. This will make the process smoother and more enjoyable.
:max_bytes(150000):strip_icc()/CabinetOpener-2000-05483ad02f854fceb8833a3d91f687d3.jpg)
Planning Your Project
Building your own kitchen cabinets is a rewarding project. It begins with careful planning. Proper planning ensures your cabinets fit perfectly and look great. Follow these steps to get started.
Measuring Your Space
Accurate measurements are crucial for building kitchen cabinets. Use a tape measure to get dimensions.
- Measure the height: Measure from the floor to the ceiling.
- Measure the width: Measure wall-to-wall, ensuring straight lines.
- Measure the depth: Measure from the wall to the front edge.
Record all measurements in a notebook. Double-check measurements for accuracy. Mistakes can cause problems later.
Designing Your Cabinets
Designing is the fun part of building cabinets. Think about your kitchen’s style and needs.
- Choose a style: Decide on a modern, classic, or rustic look.
- Determine the layout: Plan where each cabinet will go.
- Pick materials: Choose wood, plywood, or MDF for your cabinets.
Create sketches or use design software. Visualizing helps in finalizing your design. Ensure your design matches your kitchen measurements.
Here’s a simple table to help you with your design:
| Component | Material | Dimensions |
|---|---|---|
| Cabinet Box | Plywood | Height x Width x Depth |
| Cabinet Doors | Solid Wood | Height x Width |
| Shelves | Plywood | Width x Depth |
This table is a guideline. Customize it based on your design and measurements.
Choosing Materials
Building your own kitchen cabinets can be a rewarding project. The materials you choose will greatly affect the final look and durability of your cabinets. Let’s explore the different options for wood and hardware to help you make the best choice.
Types Of Wood
Choosing the right wood is crucial. Different woods offer different benefits. Here are some popular options:
| Type of Wood | Characteristics |
|---|---|
| Maple | Strong, smooth, and light-colored. Easy to paint or stain. |
| Cherry | Rich color, smooth grain. Ages beautifully. More expensive. |
| Plywood | Affordable, versatile. Made from multiple layers of wood veneer. |
| Oak | Durable, has a prominent grain. Great for a rustic look. |
Hardware And Fixtures
The hardware and fixtures are the finishing touches. They add both style and functionality to your cabinets. Here are some types to consider:
- Hinges: Choose between concealed or exposed hinges.
- Handles: Knobs or pulls come in various designs and finishes.
- Drawer slides: Opt for soft-close slides for quiet operation.
- Shelf supports: Adjustable supports can offer flexibility.
Quality hardware ensures your cabinets last longer and function better. Invest in durable materials.
Cutting And Preparing Wood
Cutting and preparing wood is a vital part of building kitchen cabinets. Proper preparation ensures that your cabinets look professional and last longer. This section covers the essential steps for cutting and preparing wood pieces for your project.
Cutting Techniques
Using the right cutting technique is crucial for accuracy and safety. Always measure twice and cut once. Here are some common cutting techniques:
- Crosscutting: Use a miter saw to cut across the grain.
- Rip Cutting: Use a table saw to cut along the grain.
- Bevel Cutting: Adjust the blade angle for angled cuts.
Ensure your blades are sharp for clean cuts. Dull blades can splinter the wood, leading to poor results.
Sanding And Smoothing
Sanding is essential for a smooth finish. Start with a coarse grit and move to finer grits.
- Begin with 80-grit sandpaper for rough surfaces.
- Move to 120-grit for a smoother finish.
- Finish with 220-grit for a polished look.
Use a sanding block or an electric sander. Always sand in the direction of the grain to avoid scratches.
After sanding, wipe the wood with a damp cloth to remove dust. This step ensures a clean surface for painting or staining.
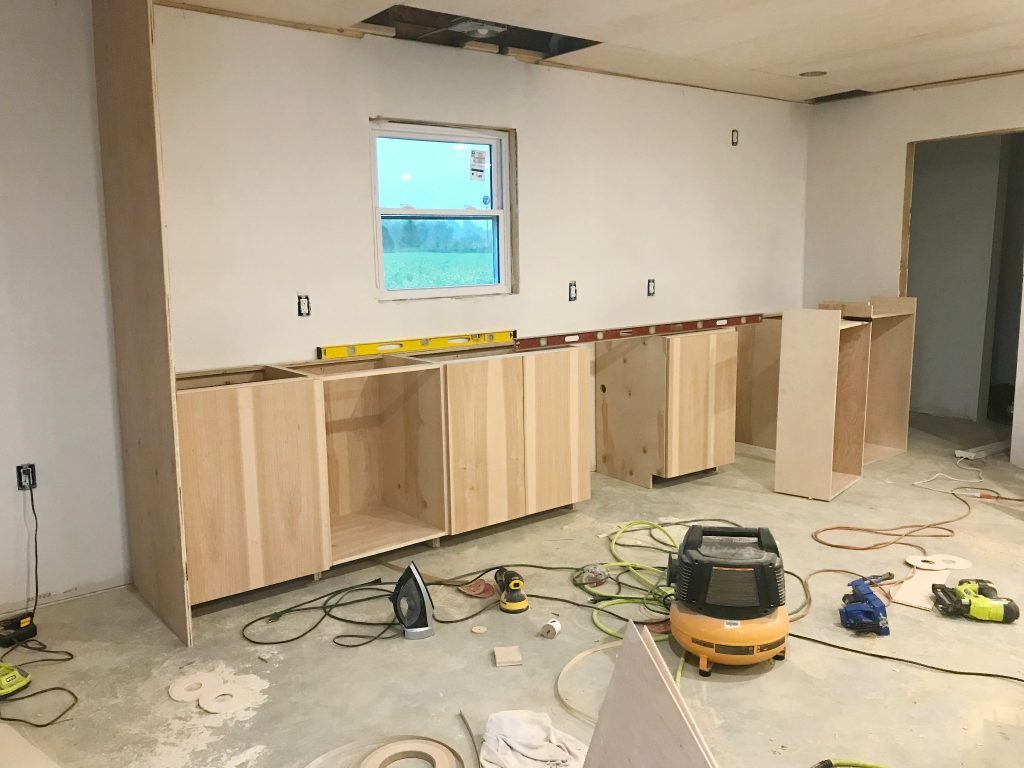
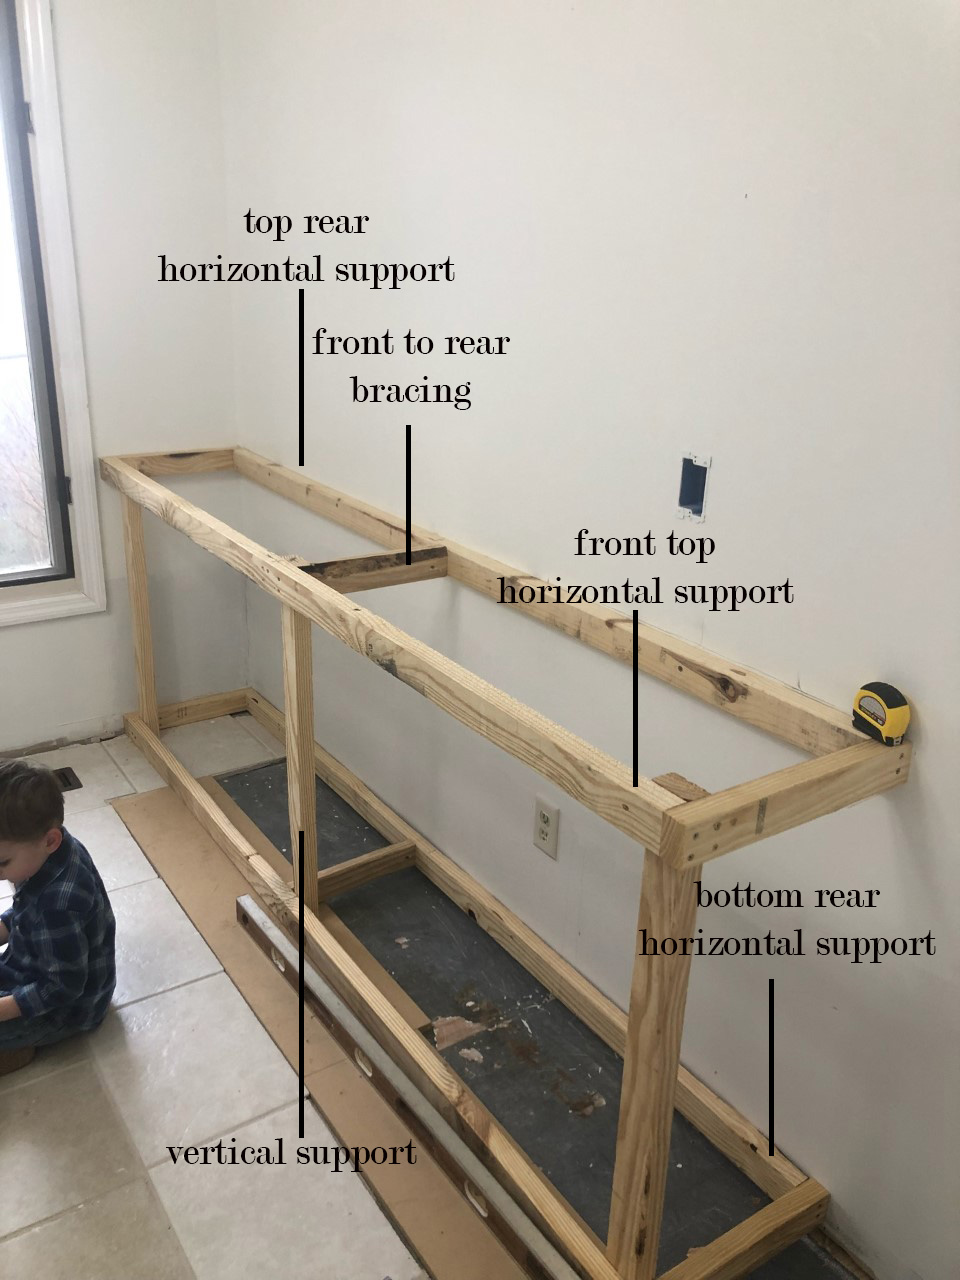
Assembling The Cabinet Frame
Building your own kitchen cabinets can be a rewarding experience. One of the most crucial steps is assembling the cabinet frame. This step includes building the base and constructing the frame. Let’s dive into each part to ensure your cabinets are sturdy and look great.
Building The Base
The base of your cabinet is the foundation. It must be strong and level. Start by gathering all the materials you need:
- Wood for the base
- Wood screws
- Wood glue
- Measuring tape
- Level
- Saw
- Drill
Follow these steps to build the base:
- Measure and cut the wood to the right size.
- Lay out the base pieces on a flat surface.
- Apply wood glue to the edges to be joined.
- Use screws to secure the pieces together.
- Check the base with a level to ensure it’s even.
A strong base ensures your cabinet stays upright and stable. Make sure to double-check measurements for accuracy.
Constructing The Frame
With the base ready, it’s time to construct the frame. The frame gives the cabinet its shape and supports the shelves and doors. You will need:
- Wood for the frame
- Wood screws
- Wood glue
- Measuring tape
- Level
- Saw
- Drill
- Clamps
Here’s how to construct the frame:
- Measure and cut the wood for the sides and top.
- Attach the side panels to the base using screws and wood glue.
- Ensure the side panels are square using a level.
- Attach the top piece to the side panels.
- Use clamps to hold the pieces while the glue dries.
The frame needs to be solid and aligned perfectly. This ensures the doors and shelves fit well later. Use a level frequently to check your work.
Installing Shelves And Dividers
Building your own kitchen cabinets can be a rewarding project. Installing shelves and dividers is a crucial step. This helps to maximize storage and keep items organized. Let’s dive into the details.
Measuring For Shelves
Accurate measurements are key to a successful installation. Use a measuring tape to measure the interior width of your cabinet. Make sure to measure from side to side. Note down the measurement. This will be the length of your shelves.
Next, determine the depth. Measure from the back wall to the front edge. This gives you the shelf depth. Write it down. Ensure all measurements are precise.
Tools you’ll need:
- Measuring tape
- Notepad and pen
- Pencil
- Level
Attaching Dividers Securely
Dividers help to segment your cabinet space. Start by measuring where you want the dividers. Mark the positions with a pencil. Use a level to ensure they are straight.
Attach the dividers with screws or brackets. For extra stability, use wood glue. Apply glue along the edges before securing with screws.
Steps to attach dividers:
- Mark divider positions
- Apply wood glue to edges
- Screw or bracket the dividers
- Ensure everything is level and straight
Double-check all placements. Make sure everything is secure and even.
Attaching Doors And Drawers
Building your own kitchen cabinets is an exciting project. One of the final steps is attaching the doors and drawers. This step requires precision and patience. Proper alignment ensures smooth operation and a polished look. Let’s dive into the details.
Hinging The Doors
Hinging the doors is crucial. Start by choosing the right hinges. Use a measuring tape to mark hinge positions on the door and cabinet. Typically, place them 2 inches from the top and bottom.
Use a drill to create pilot holes. Attach the hinges to the door first. Then, align the door with the cabinet. Ensure it is level. Screw the hinges into the cabinet frame. Adjust if necessary for a perfect fit.
Installing Drawer Slides
Installing drawer slides can be tricky but manageable. First, decide on the type of slides: side-mount, under-mount, or center-mount. Measure the inside of the cabinet and the drawer.
For side-mount slides, attach the slide to the side of the drawer. Then, attach the corresponding piece inside the cabinet. Ensure both parts are level. Slide the drawer into place and check for smooth operation.
Under-mount slides are less visible. Attach the slides underneath the drawer. Then, mount the corresponding pieces inside the cabinet. Ensure everything is aligned. Test the drawer for smooth movement.
Here’s a quick reference table for common measurements:
| Slide Type | Mounting Position | Common Measurements |
|---|---|---|
| Side-Mount | Side of Drawer | 1/2 inch clearance each side |
| Under-Mount | Bottom of Drawer | 3/8 inch clearance underneath |
| Center-Mount | Center of Drawer | 1/4 inch clearance each side |
Lastly, repeat these steps for all drawers. Align and adjust as needed.
Finishing Touches
You’ve built your cabinets. Now, let’s add the finishing touches. These final steps will make your cabinets shine.
Painting Or Staining
Choosing the right finish is crucial. It affects the look and durability.
- Painting: Use high-quality paint for a smooth finish. Sand the surface first.
- Staining: Stain enhances the wood grain. Choose a stain that matches your decor.
Both methods protect your cabinets. They also add beauty.
Adding Decorative Elements
Decorative elements add personality. They turn simple cabinets into unique pieces.
- Molding: Crown molding adds elegance. It makes your cabinets look custom.
- Hardware: Choose knobs and pulls that match your style. They are small but impactful.
- Glass Doors: Add glass inserts for a modern touch. It also breaks up the monotony of solid wood.
These elements enhance your cabinet’s appearance. They make your kitchen stand out.
Installation In Your Kitchen
Installing your own kitchen cabinets is a rewarding project. You’ll save money and customize your kitchen space. Follow these steps to ensure a smooth installation process.
Securing Cabinets To Walls
First, locate the wall studs using a stud finder. Mark their positions with a pencil. This ensures the cabinets are securely attached. Use a level to draw a horizontal line on the wall. This line should be where the bottom of the upper cabinets will sit.
Next, drill pilot holes through the back of the cabinet. Align these holes with the wall studs. Lift the cabinet into place with a helper. Drive screws through the pilot holes into the wall studs. Tighten the screws securely, ensuring the cabinet is level and flush with the wall.
Aligning And Leveling
Aligning and leveling your cabinets is crucial for a professional look. Place a level on the top of each cabinet. Adjust the cabinets until they are perfectly level. Use shims if necessary to achieve this. Shims are small pieces of wood that help level the cabinets.
Once the cabinets are level, secure them together. Use clamps to hold adjacent cabinets in place. Drill pilot holes through the frame of one cabinet into the next. Drive screws through these holes to join the cabinets. Repeat this process for all the cabinets in the row.
Check the alignment again with a level. Make any final adjustments as needed. Your cabinets should now be securely installed and perfectly aligned.
Maintenance Tips
Maintaining your kitchen cabinets ensures they stay beautiful and functional. Regular care prevents damage and extends their life. Below are essential tips for cleaning and handling repairs.
Cleaning And Care
Cleaning your cabinets regularly keeps them looking new. Use a soft cloth and mild soap. Avoid harsh chemicals that can damage the finish.
- Wipe spills immediately to prevent stains.
- Dust cabinets weekly using a microfiber cloth.
- Use gentle cleaners to avoid scratches and discoloration.
- Apply polish or wax for wooden cabinets every six months.
Ensure to clean handles and knobs. They can accumulate dirt and grease. Use a toothbrush for hard-to-reach areas.
Handling Repairs
Minor repairs keep your cabinets in top condition. Tighten loose screws and hinges to prevent damage. Replace worn-out parts promptly.
- Inspect hinges and handles regularly.
- Replace any broken or worn-out parts.
- Fill small scratches with wood filler.
- Repaint or re-stain for a fresh look.
For significant damage, consider professional help. Proper repairs extend the life of your cabinets.
Frequently Asked Questions
What Materials Are Needed To Build Kitchen Cabinets?
You need plywood, wood glue, screws, hinges, and cabinet hardware.
How Long Does It Take To Build Cabinets?
Building kitchen cabinets can take 1-2 weeks, depending on complexity.
Can I Build Kitchen Cabinets Myself?
Yes, with basic woodworking skills and tools, you can build kitchen cabinets yourself.
What Tools Are Required For Cabinet Building?
Essential tools include a table saw, drill, tape measure, clamps, and sandpaper.
How Much Does It Cost To Build Kitchen Cabinets?
Costs vary, but DIY kitchen cabinets typically range from $500 to $1500.
What Type Of Wood Is Best For Cabinets?
Plywood is a popular choice for its durability and affordability.
Do I Need A Plan Before Building Cabinets?
Yes, a detailed plan ensures accurate measurements and a successful build.
Can I Customize My Kitchen Cabinets?
Absolutely, you can customize dimensions, materials, and finishes to fit your kitchen.
How Do I Install Kitchen Cabinet Doors?
Attach hinges to the doors, then secure them to the cabinet frame.
Is It Cheaper To Build Or Buy Cabinets?
Building cabinets is generally cheaper but requires time and skills.
Conclusion
Building your own kitchen cabinets can be rewarding and cost-effective. With patience and the right tools, it’s achievable. Follow the steps carefully for a successful project. Enjoy the satisfaction of creating custom cabinets that fit your kitchen perfectly. Start today and transform your kitchen with your own hands.

