Yes, you can restain kitchen cabinets. The process involves cleaning, sanding, and applying new stain to the wood.
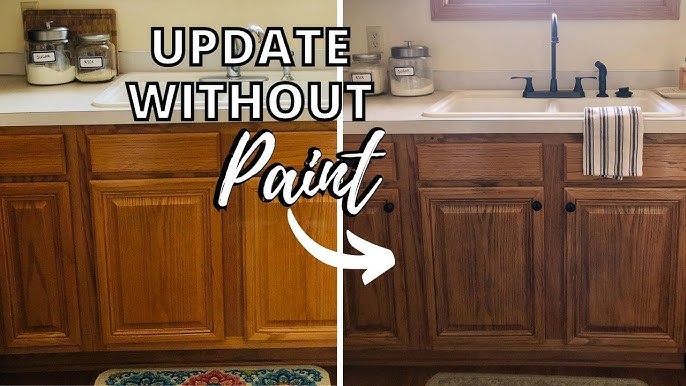
Restaining kitchen cabinets is an effective way to refresh your kitchen’s look without a full renovation. This affordable DIY project can significantly transform the appearance of your space. First, remove all cabinet doors and hardware. Clean the surfaces to eliminate grease and grime.
Sand the cabinets lightly to prepare the wood for the new stain. Choose a stain color that complements your kitchen’s existing decor. Apply the stain evenly, allowing it to penetrate the wood for a rich, consistent finish. Finally, add a protective top coat to ensure durability. Restaining can breathe new life into your kitchen, giving it a modern, updated feel.
Materials Needed
Restaining kitchen cabinets can give your space a fresh look. To get started, you need the right materials and tools. This section will guide you through the essential items required.
Essential Tools
Having the right tools will make the restaining process smoother. Here’s a list of the essential tools you’ll need:
- Screwdriver
- Sandpaper (various grits)
- Sanding block or electric sander
- Tack cloth
- Paintbrushes or foam brushes
- Clean rags
- Drop cloth or plastic sheeting
- Protective gloves and mask
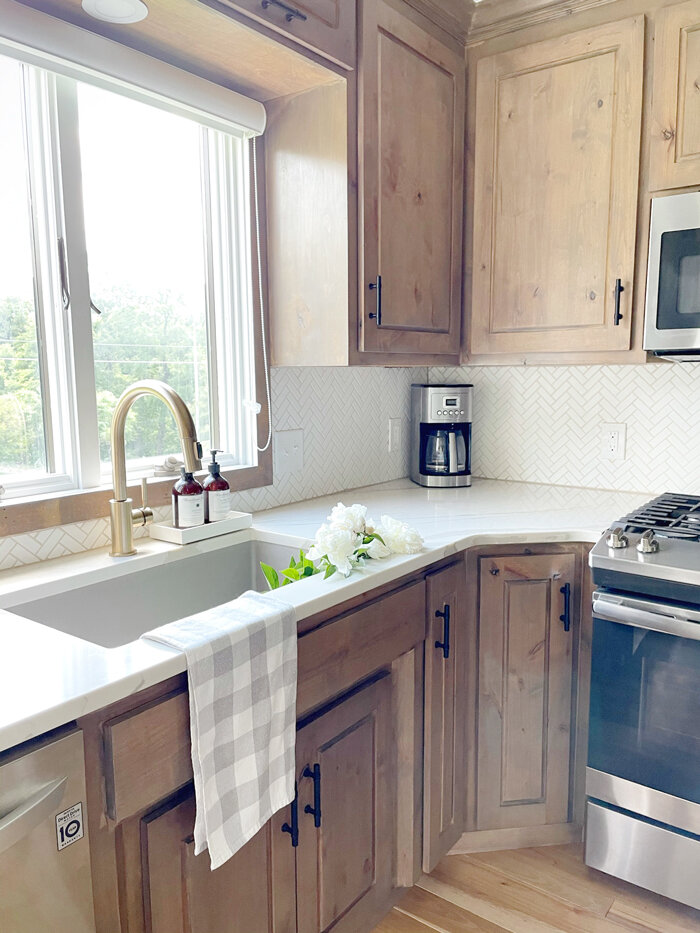
Choosing The Right Stain
Selecting the right stain is crucial for achieving the desired look. Here are some tips to help you choose:
- Oil-based stains: These provide a rich, deep finish and are durable.
- Water-based stains: These dry faster and have less odor but may raise the wood grain.
- Gel stains: These are thicker and less likely to drip, ideal for vertical surfaces.
- Color: Consider the existing decor and lighting in your kitchen.
Make sure to buy extra stain to cover any mistakes. Always test the stain on a small, hidden area first. This will help you see how it looks on your cabinets.
Preparation
Restaining kitchen cabinets can breathe new life into your kitchen space. Proper preparation is key to a successful project. Follow these steps to ensure your cabinets are ready for a fresh coat of stain.
Emptying The Cabinets
First, empty all items from your cabinets. This includes dishes, cookware, and pantry items. Use boxes or bins to organize them. Label the boxes for easy reorganization later. Removing all items helps prevent damage and keeps your workspace tidy.
Cleaning And Sanding
Next, clean your cabinets thoroughly. Use a mild detergent or a mix of vinegar and water. Wipe down all surfaces to remove grease and grime. A clean surface ensures the stain adheres properly.
After cleaning, let the cabinets dry completely. Then, sand the surfaces lightly. Use 150-grit sandpaper for this step. Sanding removes old stain and smoothens the wood. It also helps the new stain penetrate better.
| Step | Action |
|---|---|
| 1 | Empty Cabinets |
| 2 | Clean Surfaces |
| 3 | Sand Lightly |
Ensure you wipe away all sanding dust. Use a tack cloth for best results. This prepares the surface for a smooth and even stain application.
Removing Old Finish
Restaining kitchen cabinets can breathe new life into your kitchen. Before you start, removing the old finish is essential. This step ensures a smooth and even application of the new stain. Below, we cover two effective methods for removing the old finish: using a chemical stripper and sanding techniques.
Using A Chemical Stripper
Chemical strippers can quickly remove old finishes from cabinets. These products dissolve the old stain and varnish, making it easier to wipe off. Here is a simple step-by-step guide:
- Wear protective gloves and safety goggles.
- Apply the chemical stripper with a paintbrush.
- Wait for the stripper to work (usually 15-30 minutes).
- Use a plastic scraper to remove the dissolved finish.
- Wipe the surface with a damp cloth to remove residue.
Always work in a well-ventilated area. Chemical strippers can release strong fumes. Follow the manufacturer’s instructions for the best results.
Sanding Techniques
Sanding is another effective method for removing old finishes. This process involves using sandpaper to strip away the old stain and varnish. Here’s how to do it:
- Start with coarse-grit sandpaper (80-grit).
- Sand in the direction of the wood grain.
- Switch to medium-grit sandpaper (120-grit) for a smoother finish.
- Finish with fine-grit sandpaper (220-grit) for a polished surface.
- Wipe away dust with a tack cloth.
Sanding can be a bit more labor-intensive. However, it provides excellent control over the removal process. Using an electric sander can speed up the job.
Here’s a quick comparison of both methods:
| Method | Pros | Cons |
|---|---|---|
| Chemical Stripper | Quick, Efficient | Fumes, Requires Safety Gear |
| Sanding | Control, No Fumes | Labor-Intensive, Dust |
Choose the method that best fits your needs. Both will prepare your cabinets for a new, beautiful stain.
Applying New Stain
Restaining kitchen cabinets can breathe new life into your kitchen. Applying a new stain is a crucial step. This section will guide you through the process.
Selecting Application Method
Selecting the right application method is vital for a smooth finish. You have a few options:
- Brush: Ideal for detailed work and edges.
- Cloth: Great for a smooth, even coat.
- Sprayer: Best for large areas and even coverage.
Choose the method that suits your comfort and project size.
Tips For Even Application
Ensure an even application to achieve a professional look. Follow these tips:
- Prepare the Surface: Sand the cabinets thoroughly.
- Test the Stain: Apply on a hidden area first.
- Apply in Sections: Work on small areas at a time.
- Wipe Excess Stain: Use a clean cloth to remove extra stain.
- Dry Completely: Allow the stain to dry fully before adding another coat.
These steps ensure your cabinets look fresh and new.
Drying And Curing
Restaining kitchen cabinets can give your kitchen a fresh look. To get the best results, understanding the drying and curing process is crucial. This ensures the stain sets properly and lasts longer.
Drying Time
The drying time for stains varies based on the type of stain used. Oil-based stains typically take longer to dry than water-based stains. On average, you can expect oil-based stains to dry within 6-8 hours. Water-based stains dry faster, usually within 2-4 hours. Always refer to the manufacturer’s instructions for specific drying times.
Ensure the room is well-ventilated while the stain dries. Proper ventilation speeds up the drying process and reduces odor.
Curing Process
After the stain dries, the curing process begins. Curing is the hardening of the stain, which can take up to 30 days. During this period, avoid heavy use of the cabinets.
The curing process can be broken down into three stages:
- Initial Drying: The stain feels dry to the touch. This occurs within 24 hours.
- Soft Curing: The stain starts to harden but can still be damaged. This stage lasts about 7 days.
- Full Curing: The stain reaches maximum hardness. This takes up to 30 days.
To ensure a smooth curing process, maintain a stable room temperature and avoid excessive humidity. This helps the stain cure evenly and reduces the risk of imperfections.
Sealing The Stain
Sealing the stain on your kitchen cabinets is a crucial step. It ensures durability and maintains the beauty of your freshly stained cabinets. A proper sealant will protect against moisture, stains, and wear.
Choosing A Sealant
Picking the right sealant depends on your needs and preferences. Here are some popular options:
| Sealant Type | Pros | Cons |
|---|---|---|
| Polyurethane | Durable, water-resistant | Long drying time |
| Shellac | Quick drying, easy to apply | Less durable |
| Varnish | High durability, UV protection | May yellow over time |
Application Tips
Follow these tips for a smooth application of your chosen sealant:
- Clean Surface: Ensure the cabinets are dust-free.
- Use a Brush: Apply with a high-quality brush for even coverage.
- Thin Coats: Apply thin coats to avoid drips and bubbles.
- Sanding: Lightly sand between coats for a smooth finish.
- Drying Time: Allow adequate drying time between coats.
By following these steps, your cabinets will have a professional finish.
Reassembly And Cleanup
After you’ve finished staining your kitchen cabinets, it’s time for reassembly and cleanup. This stage ensures your kitchen looks neat and the cabinets function properly. Follow these steps for a smooth finish.
Reattaching Hardware
Gather all the screws, hinges, and handles. Make sure you have every piece.
Use a screwdriver to reattach the hinges to the cabinet doors. Ensure they are tight but not overly so to avoid stripping the screws.
Align the cabinet doors with the frames. Start by attaching the top hinge, then the bottom. Use a level to ensure the doors are straight.
Once the doors are in place, reattach the handles or knobs. Double-check that all hardware is secure.
A well-attached door will open and close smoothly. If it doesn’t, adjust the hinges slightly.
Final Cleanup
After reattaching the hardware, it’s time for the final cleanup.
First, remove any protective coverings you used during the staining process. Carefully peel off tape and drop cloths.
Wipe down the cabinets and surrounding areas with a damp cloth. This removes any dust or debris left behind.
Inspect the cabinets for any missed spots or drips. Touch up these areas with a small brush.
Finally, ensure the workspace is tidy. Put away all tools and materials.
Your kitchen should now look refreshed and clean, with beautifully stained cabinets.
Maintenance Tips
Maintaining your freshly restained kitchen cabinets is crucial for their longevity. Here are some practical tips to keep them looking their best.
Routine Cleaning
Regular cleaning is essential to maintain the beauty of your cabinets. Use a soft cloth and mild soap. Avoid harsh chemicals that can damage the finish. Clean spills immediately to prevent staining.
- Use a damp cloth for daily cleaning.
- Dry with a soft towel to avoid water spots.
- Apply gentle pressure to protect the finish.
Touch-up Tips
Minor scratches and dents are inevitable. Touching up these imperfections can extend the life of your cabinets.
- Keep a touch-up kit handy.
- Match the stain color accurately.
- Apply the touch-up stain with a fine brush.
- Wipe off excess stain quickly.
- Allow the touched-up area to dry completely.
Following these maintenance tips will ensure your kitchen cabinets remain stunning for years.
Frequently Asked Questions
Can You Restain Kitchen Cabinets?
Yes, you can restain kitchen cabinets to refresh their look and update your kitchen’s style.
What Is The Best Stain For Cabinets?
Oil-based stains are popular for cabinets due to their durability and rich finish.
How Do You Prepare Cabinets For Restaining?
Clean thoroughly, sand off old finish, and remove all dust before applying the new stain.
Do I Need To Sand Before Restaining?
Yes, sanding is essential to remove the old finish and help the new stain adhere better.
Can You Restain Without Stripping?
Yes, but the new stain may not adhere well or look uniform without stripping the old finish.
How Long Does Restaining Cabinets Take?
It typically takes a few days, depending on drying times and the number of coats applied.
Is Restaining Cheaper Than Replacing Cabinets?
Yes, restaining is significantly cheaper than replacing cabinets, making it a cost-effective renovation option.
What Tools Are Needed For Restaining?
You’ll need sandpaper, a brush or cloth for the stain, and a topcoat for protection.
How Many Coats Of Stain Are Needed?
Usually, two to three coats of stain are recommended for an even and rich finish.
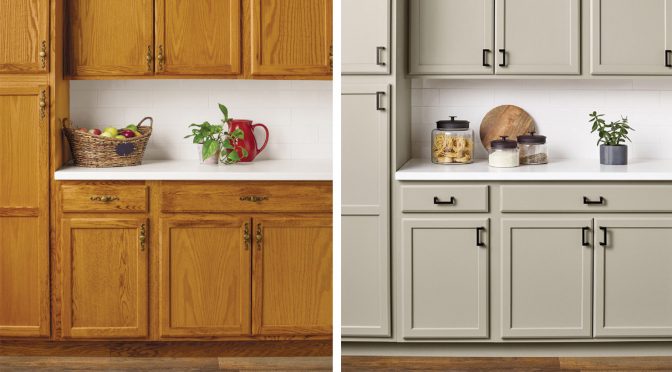
Can You Change Cabinet Color With Stain?
Yes, you can change the color, but darker stains cover light ones better than vice versa.
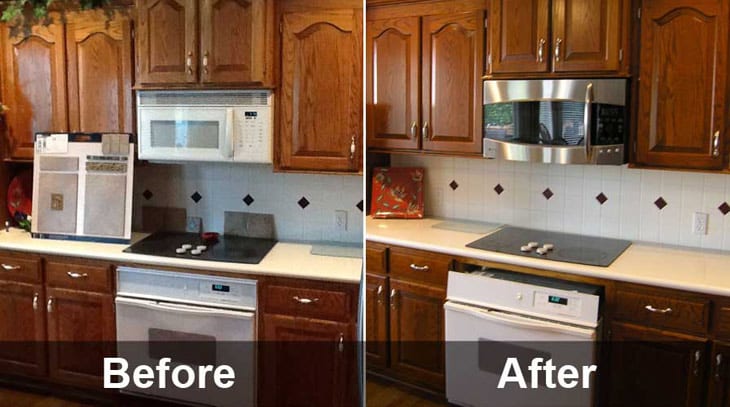
Conclusion
Restaining kitchen cabinets can transform your space without a full renovation. It’s cost-effective and refreshes your kitchen. With proper preparation, the process is manageable for most DIY enthusiasts. Always choose high-quality materials for best results. Restaining gives your cabinets a new life, enhancing your kitchen’s beauty and functionality.

