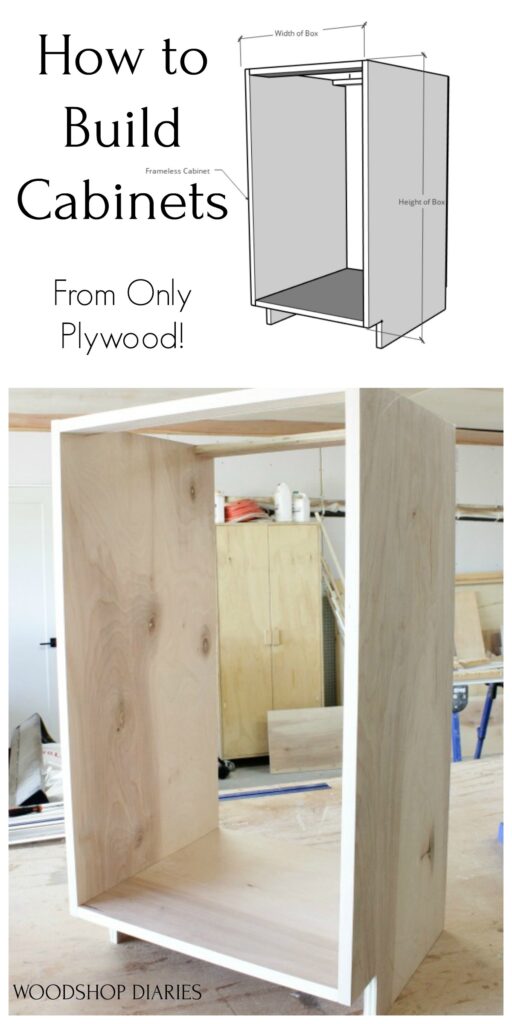
To make kitchen cabinets with plywood, measure and cut plywood pieces, then assemble them with screws and wood glue. Finish with paint or stain.
Building kitchen cabinets with plywood is a cost-effective and customizable option. Plywood is durable and versatile, making it ideal for cabinetry. Start by designing the cabinet layout and measuring the dimensions accurately. Use a table saw to cut the plywood sheets into the required sizes for the sides, back, top, bottom, and shelves.
Assemble the pieces using screws and wood glue for a sturdy structure. Sand the surfaces to smooth any rough edges. Finally, apply paint or stain to match your kitchen décor. This DIY project can save you money and allow for a personalized touch in your kitchen.

Introduction To Diy Cabinets
Creating your own kitchen cabinets can be a fun and rewarding project. DIY cabinets allow you to customize your kitchen to fit your unique style and needs. Using plywood is a cost-effective and durable option for building cabinets. This guide will walk you through the basics of making your own cabinets with plywood.
Benefits Of Diy
Building your own cabinets offers several benefits:
- Cost Savings: DIY cabinets are often cheaper than buying pre-made ones.
- Customization: You can design cabinets to fit your exact specifications.
- Quality Control: You have control over the materials and craftsmanship.
- Personal Satisfaction: There’s a great sense of accomplishment in building something yourself.
Materials Needed
To build kitchen cabinets with plywood, you will need the following materials:
| Item | Description |
|---|---|
| Plywood | Choose high-quality plywood for durability and better finish. |
| Screws | Use wood screws for strong and secure joints. |
| Wood Glue | Essential for bonding plywood pieces together. |
| Sandpaper | For smoothing the edges and surfaces of the plywood. |
| Paint or Stain | To finish and protect the surface of the cabinets. |
| Hinges | For attaching cabinet doors securely. |
| Handles or Knobs | For opening and closing cabinet doors easily. |
Having these materials ready will ensure a smooth and efficient building process.
Selecting The Right Plywood
Choosing the right plywood is crucial for making durable kitchen cabinets. The right plywood ensures strength, longevity, and a pleasing finish. Let’s explore how to select the best plywood for your kitchen cabinets.
Types Of Plywood
Different types of plywood are available, each with unique properties. Understanding these types helps you make the right choice.
- Softwood Plywood: Made from softwood trees like pine, fir, or spruce. Ideal for structural purposes.
- Hardwood Plywood: Made from hardwood trees like oak, maple, or birch. Known for its strength and durability.
- Cabinet-Grade Plywood: Specifically designed for cabinetry. Offers a smooth finish and high strength.
- Marine Plywood: Water-resistant and suitable for areas with high moisture. Great for kitchen environments.
Choosing Quality Plywood
Quality plywood ensures your cabinets last longer and look better. Here are some tips to choose quality plywood:
- Check the Veneer: Ensure the veneer is smooth without any cracks or knots.
- Examine the Core Layers: Layers should be even and without gaps. Uneven layers can weaken the plywood.
- Look for Certifications: Certified plywood meets quality standards. Look for stamps like ISI, FSC, or CARB.
- Grade of Plywood: Choose grade A or B for a smooth and defect-free surface.
Using a table can help compare different types and qualities of plywood:
| Plywood Type | Best For | Features |
|---|---|---|
| Softwood Plywood | Structural purposes | Lightweight, less expensive |
| Hardwood Plywood | Cabinet making | Strong, durable |
| Cabinet-Grade Plywood | Cabinetry | Smooth finish, high quality |
| Marine Plywood | High moisture areas | Water-resistant, durable |
By following these tips, you can select the best plywood for your kitchen cabinets. This ensures your cabinets are strong, durable, and beautiful.
Essential Tools And Equipment
Creating kitchen cabinets with plywood requires the right tools. These tools ensure precision and efficiency. Below, you’ll find a list of the essential hand tools and power tools needed for this project.
Hand Tools
Hand tools are crucial for detailed work. They help you achieve a polished finish.
- Measuring Tape: For accurate measurements.
- Square: Ensures all angles are perfect.
- Clamps: Holds pieces steady while you work.
- Screwdriver Set: For assembling and disassembling parts.
- Chisels: Useful for fine woodwork details.
- Hammer: Essential for nailing and adjustments.
- Sandpaper: Smooths the plywood edges and surfaces.
Power Tools
Power tools make the job quicker and more precise. Here are the essential ones:
- Table Saw: For cutting large plywood sheets.
- Circular Saw: Ideal for quick, straight cuts.
- Jigsaw: Perfect for curved or intricate cuts.
- Drill: For creating holes and driving screws.
- Router: Adds decorative edges and details.
- Power Sander: Smoothens surfaces faster than hand sanding.
Having these tools ensures your kitchen cabinet project goes smoothly. Each tool serves a unique purpose and contributes to a professional finish.
:max_bytes(150000):strip_icc()/CabinetOpener-2000-05483ad02f854fceb8833a3d91f687d3.jpg)
Preparing Your Workspace
Creating kitchen cabinets with plywood requires a well-prepared workspace. A clean, organized area improves efficiency and safety. Setting up your workspace correctly ensures a smoother project flow.
Setting Up The Area
First, choose a spacious area to work. You need room for large plywood sheets. Clear any clutter that might get in the way.
Next, set up a sturdy workbench. This bench should be at a comfortable height. Ensure it can support the weight of your materials.
Gather all necessary tools and materials. This includes saws, drills, screws, and measuring tapes. Keep them within easy reach to save time.
Tip: Organize tools in a toolbox or on a pegboard. This keeps your workspace tidy and efficient.
Safety Precautions
Safety should be your top priority. Always wear protective gear. This includes safety goggles, ear protection, and gloves.
Ensure your workspace is well-lit. Good lighting helps prevent accidents. Use overhead lights or portable lamps if needed.
Keep a first aid kit nearby. Accidents can happen, so be prepared. Know where it is and how to use it.
Make sure your tools are in good condition. Sharp blades and well-maintained equipment reduce the risk of injury.
Remember: Always follow the manufacturer’s safety instructions for your tools.
Workspace Checklist
| Task | Completed |
|---|---|
| Clear the workspace | |
| Set up workbench | |
| Gather tools and materials | |
| Wear protective gear | |
| Check tool conditions |
Measuring And Cutting Plywood
Creating kitchen cabinets with plywood can be exciting. The first step involves measuring and cutting the plywood accurately. This ensures your cabinets fit perfectly and look professional. Let’s break down the process into two main parts: Accurate Measurements and Cutting Techniques.
Accurate Measurements
Accurate measurements are crucial for well-fitting cabinets. Follow these steps for precision:
- Measure the space: Use a tape measure to get the dimensions of your cabinet area. Write down the height, width, and depth.
- Calculate plywood sheets needed: Divide your dimensions by the plywood sheet size. Typically, plywood sheets come in 4×8 feet dimensions.
- Mark the plywood: Use a pencil and straight edge to mark where you will cut. Double-check your measurements to avoid mistakes.
Cutting Techniques
Proper cutting techniques ensure clean edges and a professional finish. Here are some methods:
- Circular saw: Ideal for long, straight cuts. Ensure the blade is sharp and set to the correct depth.
- Table saw: Provides precise cuts, especially for repetitive pieces. Adjust the fence for consistent width.
- Jigsaw: Best for curved or irregular cuts. Use a fine-tooth blade for smoother edges.
Remember to always wear safety gear while cutting plywood. This includes goggles and gloves to protect your eyes and hands.
For complex cuts, consider using a cutting guide or a template. This helps in achieving uniform pieces.
To summarize the cutting techniques:
| Tool | Best For |
|---|---|
| Circular Saw | Long, straight cuts |
| Table Saw | Precision and repetitive cuts |
| Jigsaw | Curved or irregular cuts |
Using these tools and techniques will help you achieve professional results. Accurate measuring and cutting plywood is the foundation of creating beautiful kitchen cabinets.
Assembling The Cabinet Frame
Building your own kitchen cabinets can be rewarding. The cabinet frame is the backbone. It needs to be strong and stable. Here’s how to assemble it using plywood.
Joining Methods
There are several ways to join plywood. Choose the best method for your project.
- Butt Joints: Easy to make. Use glue and screws.
- Dado Joints: Stronger than butt joints. Cut grooves in the wood.
- Pocket Holes: Quick and hidden. Use a pocket hole jig.
Securing The Structure
Ensure your cabinet frame is secure. Follow these steps:
- Lay out the pieces: Arrange all parts on a flat surface.
- Apply glue: Add wood glue to the edges.
- Join pieces: Use your chosen method to join the parts.
- Clamp and dry: Clamp the frame and let it dry overnight.
- Add screws: Reinforce with screws for extra strength.
Building a strong frame is key. Take your time and ensure accuracy.
Installing Shelves And Dividers
Installing shelves and dividers in your kitchen cabinets can transform your storage space. With the right technique, you can maximize your cabinet space efficiently. This section will guide you through the process of installing shelves and dividers step by step.
Shelf Placement
Proper shelf placement ensures optimal use of your cabinet space. Here’s how to do it:
- Measure the interior height of the cabinet.
- Decide the number of shelves you need.
- Mark the positions for shelf brackets.
- Drill pilot holes for the brackets.
- Attach the brackets to the cabinet sides.
- Place the plywood shelves on the brackets.
Use a level to ensure the shelves are straight. Adjust as needed to achieve a balanced look.
Divider Installation
Dividers help in organizing items within the cabinets. Follow these steps to install dividers:
- Measure the depth and height of the cabinet.
- Cut the plywood to the desired divider size.
- Sand the edges for a smooth finish.
- Mark the position where the divider will be placed.
- Use a clamp to hold the divider in place.
- Drill pilot holes through the cabinet and into the divider.
- Screw the divider securely into place.
Make sure the dividers are level and spaced evenly. This will create neat sections for your items.
| Step | Action |
|---|---|
| 1 | Measure cabinet dimensions |
| 2 | Cut plywood to size |
| 3 | Sand edges |
| 4 | Mark positions |
| 5 | Attach brackets or dividers |
These steps will help you create organized and functional kitchen cabinets. With careful planning and precise measurements, your cabinets will look professional and tidy.
Finishing Touches
The finishing touches on your kitchen cabinets make a big difference. Finishing touches include sanding and smoothing the plywood and applying finishes to protect and beautify the wood. These steps ensure your cabinets look professional and last a long time.
Sanding And Smoothing
Sanding is an important step in making plywood cabinets. It helps create a smooth surface, ready for finishing.
- Start with coarse-grit sandpaper like 80-grit.
- Sand the plywood surface evenly.
- Move to finer grit sandpaper like 120-grit for a smoother finish.
- Finish with 220-grit sandpaper for the smoothest surface.
Use a sanding block to keep the sandpaper flat. This helps avoid uneven surfaces. Always sand in the direction of the wood grain.
Applying Finishes
Applying finishes protects the plywood and enhances its appearance. Choose a finish that matches your kitchen style.
| Finish Type | Benefits |
|---|---|
| Paint | Comes in many colors, easy to clean. |
| Varnish | Provides a durable, shiny surface. |
| Stain | Enhances natural wood grain, available in various shades. |
Follow these steps to apply the finish:
- Clean the sanded surface with a damp cloth.
- Apply a primer if using paint.
- Use a brush or roller to apply the finish.
- Let the first coat dry completely.
- Sand lightly with 220-grit sandpaper between coats.
- Apply a second coat for a smooth, even finish.
Repeat the process for additional coats if needed. Allow the finish to cure completely before using your cabinets. This ensures a long-lasting and beautiful result.
Mounting The Cabinets
Mounting your newly built kitchen cabinets is an exciting step. This process ensures that your cabinets are secure and level. Proper mounting increases the durability and function of your cabinets.
Wall Mounting
First, use a stud finder to locate the studs in your kitchen wall. Mark these spots with a pencil. Studs offer the strongest support for your cabinets.
Next, measure the height where you want to mount the cabinets. Use a level to draw a straight line. This line acts as a guide for mounting. Aligning the cabinets along this line ensures they are straight.
Prepare your mounting screws. Pre-drill holes in the back of the cabinets. This makes it easier to screw them into the wall. It also reduces the risk of splitting the wood.
Lift the cabinet and align it with the guide line. Have someone hold it in place if needed. Use a drill to screw through the pre-drilled holes into the wall.
Securing To Studs
Start by attaching the top screws first. This secures the cabinet in place. Then, add screws at the bottom for extra stability. Screwing into studs ensures the cabinet holds heavy items without sagging.
Check the cabinet with a level again. Adjust if needed before tightening all screws. Repeat these steps for each cabinet.
Once all cabinets are mounted, secure them to each other. Use clamps to hold them together. Drill pilot holes and screw them together through the side panels.
Finally, check all cabinets to ensure they are level and secure. Tighten any loose screws. Your kitchen cabinets are now ready for use!
Maintenance Tips
Maintaining your plywood kitchen cabinets ensures they last long. Proper care keeps them looking great. Here are some essential tips for keeping your cabinets in top shape.
Cleaning Methods
Regular cleaning is vital for your plywood cabinets. Dust and grime can build up. Follow these simple steps:
- Wipe with a soft cloth weekly.
- Use mild soap and water for deeper cleaning.
- Avoid harsh chemicals. They can damage the wood.
- Dry the cabinets immediately after cleaning.
For sticky spots or grease, use a mixture of vinegar and water. This natural solution is safe. It also leaves a fresh scent.
Pro Tip: Use a microfiber cloth. It picks up dust better and protects the surface.
Repairing Damages
Accidents happen. Knowing how to repair minor damages can save you money. Here are some common issues and solutions:
| Issue | Solution |
|---|---|
| Scratches | Use a wood filler. Sand lightly and repaint. |
| Dents | Fill with wood putty. Sand and finish to match. |
| Loose Hinges | Tighten screws. Replace if necessary. |
For more severe damage, consult a professional. They can ensure a perfect fix.
Pro Tip: Keep a small repair kit handy. It should include wood filler, sandpaper, and matching paint.
Frequently Asked Questions
What Type Of Plywood Is Best?
Cabinet-grade plywood is best for making kitchen cabinets due to its durability and smooth finish.
How Thick Should Plywood Be?
Plywood should be at least 3/4 inch thick for sturdy kitchen cabinets.
Can I Use Mdf Instead?
MDF can be used but is less durable and more prone to water damage than plywood.
Do I Need Special Tools?
Basic woodworking tools like a table saw, drill, and sander are sufficient for making kitchen cabinets with plywood.
How Do I Finish Plywood Cabinets?
Sand the plywood, apply primer, and then use paint or a wood stain for a smooth finish.
Is Plywood Eco-friendly?
Plywood is more eco-friendly than solid wood as it uses fewer trees and can be made from sustainable sources.
How Do I Cut Plywood Accurately?
Use a table saw with a fine-toothed blade and a straight edge to ensure accurate cuts.
Can I Paint Plywood Cabinets?
Yes, you can paint plywood cabinets. Use a good primer and high-quality paint for best results.
How Do I Assemble Plywood Cabinets?
Assemble using wood glue and screws. Clamps help hold pieces in place while the glue dries.
Are Plywood Cabinets Durable?
Yes, plywood cabinets are very durable and can last many years with proper care and maintenance.
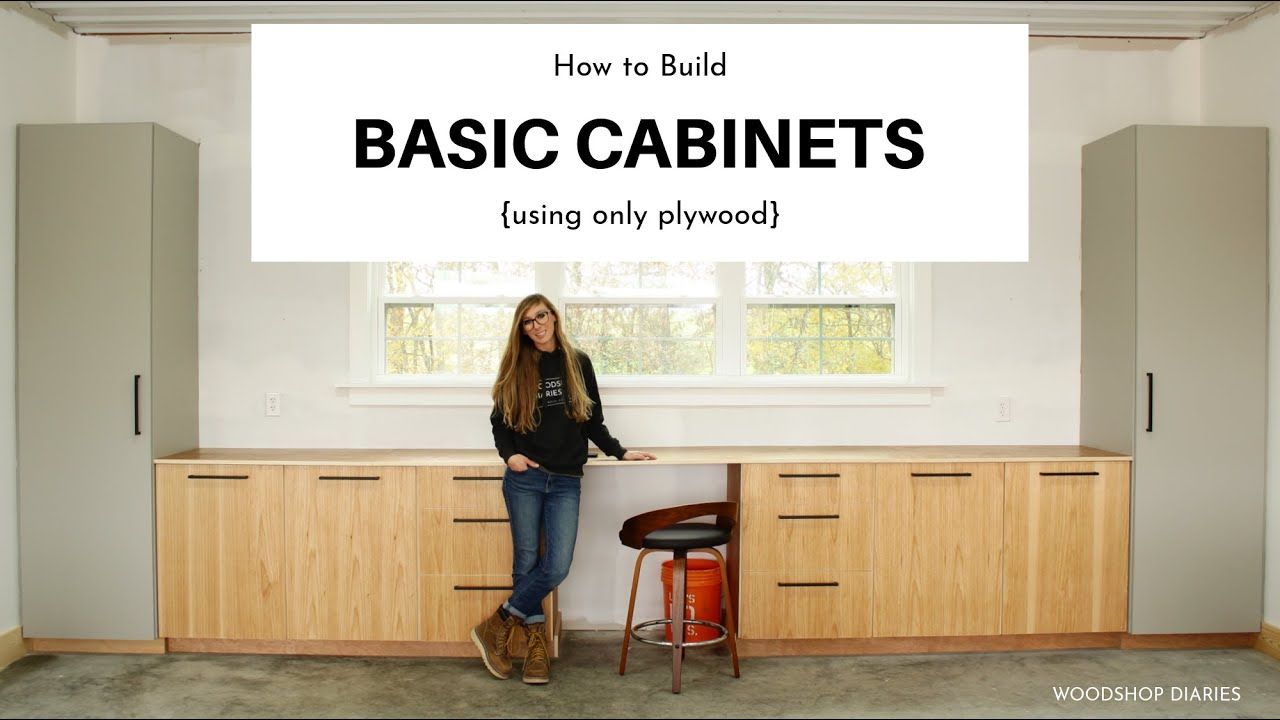
Conclusion
Creating kitchen cabinets with plywood is a rewarding DIY project. It allows customization and cost savings. With the right tools and techniques, you can build sturdy and stylish cabinets. Remember to measure carefully and choose quality plywood. Enjoy your new, personalized kitchen cabinets!

