Tighten loose screws and replace damaged hinges to fix kitchen cabinets. Fill cracks with wood filler and sand smooth.
Kitchen cabinets can wear over time, showing signs of damage or misalignment. Fixing them yourself can save money and refresh your kitchen’s look. Start by inspecting all screws and hinges, tightening any that are loose. Damaged hinges should be replaced for better cabinet stability.
Cracks or holes can be filled with wood filler, then sanded for a smooth finish. This process restores functionality and improves the overall appearance of your cabinets. Regular maintenance, like cleaning and minor repairs, can extend the life of your kitchen cabinets and keep them looking new. With the right tools and a bit of effort, you can easily fix common cabinet issues.
Tools And Materials Needed
Fixing kitchen cabinets is a task you can do yourself. To start, gather the essential tools and required materials. Having everything ready will save you time.
Essential Tools
Here is a list of the essential tools you will need:
- Screwdrivers – Both Phillips and flathead are necessary.
- Drill – A power drill will make your job easier.
- Hammer – Useful for securing nails and adjusting parts.
- Level – Ensures your cabinets are straight.
- Measuring Tape – For accurate measurements.
- Clamps – Holds parts together while you work.
- Utility Knife – For cutting and trimming materials.
Required Materials
Ensure you have the following materials on hand:
- Screws – Different sizes for various parts of the cabinets.
- Nails – For minor fixes and adjustments.
- Wood Glue – For repairing and securing wood parts.
- Sandpaper – For smoothing surfaces.
- Paint or Stain – To finish and protect the wood.
- Hinges – Replace old or broken hinges.
- Drawer Slides – Ensure drawers open and close smoothly.
With these tools and materials, you can start fixing your kitchen cabinets. Happy fixing!
Assessing The Damage
Before fixing your kitchen cabinets, it’s important to assess the damage. This step helps you understand the extent of the problem and plan your repairs effectively. Below, we’ll guide you through identifying issues and evaluating their severity.
Identifying Issues
Start by examining the cabinet doors, frames, and hardware. Look for the following common issues:
- Loose Hinges: Check if the cabinet doors wobble or hang unevenly.
- Scratches and Dents: Inspect for surface damages that affect appearance.
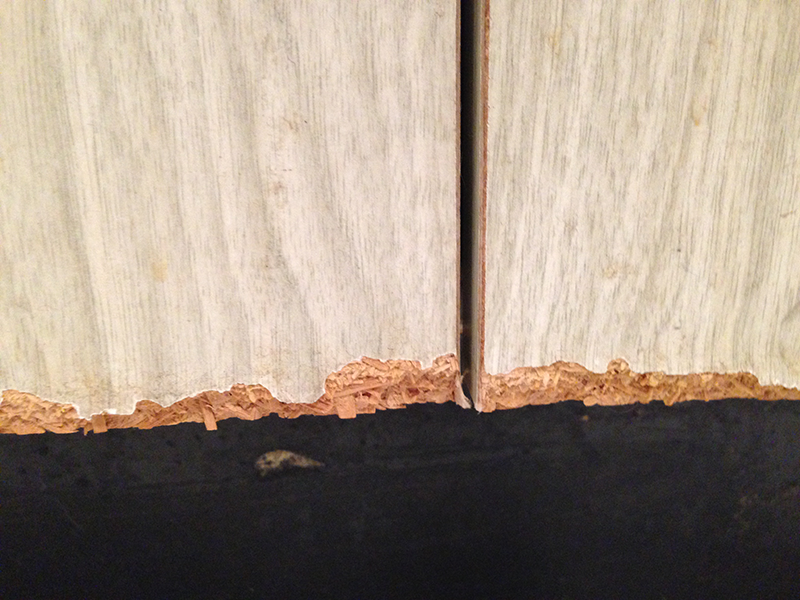
- Water Damage: Notice any swelling or discoloration on the wood.
- Broken Shelves: Ensure all shelves are stable and intact.
- Peeling Paint: Look for areas where the paint is chipping or peeling.
Evaluating Severity
Next, evaluate the severity of each issue. This helps prioritize your repairs.
| Issue | Severity Level | Action Needed |
|---|---|---|
| Loose Hinges | Low | Re-tighten or replace screws |
| Scratches and Dents | Medium | Sand and repaint |
| Water Damage | High | Replace affected parts |
| Broken Shelves | High | Replace or repair shelves |
| Peeling Paint | Medium | Sand and repaint |
By identifying issues and evaluating their severity, you can create a clear plan. This will make fixing your kitchen cabinets easier and more efficient.
Removing The Cabinets
Want to fix your kitchen cabinets? The first step is removing them. This process requires careful planning and the right tools. Follow our guide for a smooth removal experience.
Safety Precautions
- Wear safety goggles to protect your eyes from debris.
- Use gloves to avoid cuts and splinters.
- Ensure all power tools are unplugged before use.
- Have a sturdy step ladder for high cabinets.
- Keep a first aid kit nearby for emergencies.
Disassembly Process
- Empty the cabinets completely. This makes them lighter and easier to handle.
- Use a screwdriver to remove the cabinet doors. This step prevents damage.
- Unscrew the hinges from the frame. Place screws in a safe container.
- Disconnect any electrical appliances connected to the cabinets. Safety first!
- Remove the mounting screws from the wall. Use a drill for this step.
- Carefully lift the cabinet off the wall. Have a friend assist you.
Removing kitchen cabinets can be easy with the right steps. Always prioritize safety and follow our guide.
Repairing Cabinet Frames
Repairing cabinet frames can extend the life of your kitchen cabinets. Over time, cabinets face wear and tear. Fixing cracks and reinforcing weak areas are essential tasks. Let’s dive into these simple yet effective methods.
Fixing Cracks
Cracks in cabinet frames can make them look old. Here’s how to fix them:
- Clean the area: Use a damp cloth to clean the crack.
- Apply wood filler: Choose a wood filler that matches the cabinet color. Fill the crack with the wood filler.
- Smooth the surface: Use a putty knife to smooth the filler.
- Let it dry: Allow the filler to dry completely. This might take a few hours.
- Sand the area: Lightly sand the filled area until it’s smooth.
- Paint or stain: Match the repaired area with the rest of the cabinet.
Reinforcing Weak Areas
Weak areas in cabinet frames can cause structural issues. Reinforcing these areas ensures stability. Follow these steps:
- Identify weak spots: Look for loose joints or sagging areas.
- Add corner braces: Use metal corner braces to strengthen the joints.
- Use wood glue: Apply wood glue to loose joints for added strength.
- Screw in the braces: Secure the braces with screws for a firm hold.
- Check for sturdiness: Ensure the frame feels solid and secure.
| Steps | Fixing Cracks | Reinforcing Weak Areas |
|---|---|---|
| 1 | Clean the area | Identify weak spots |
| 2 | Apply wood filler | Add corner braces |
| 3 | Smooth the surface | Use wood glue |
| 4 | Let it dry | Screw in the braces |
| 5 | Sand the area | Check for sturdiness |
| 6 | Paint or stain |
Replacing Cabinet Doors
Replacing cabinet doors can breathe new life into your kitchen. This is a cost-effective way to update your space without a complete overhaul. You’ll need to measure for new doors and install hinges correctly. Follow the steps below to ensure a smooth process.
Measuring For New Doors
Accurate measurements are crucial for a perfect fit. Use a tape measure to get the width and height of each cabinet opening. Write down the measurements for all doors. Remember to measure twice to avoid errors.
- Measure the width: Place the tape measure on the left edge and stretch it to the right edge.
- Measure the height: Start from the top edge and pull the tape measure to the bottom edge.
- Note down measurements: Use a notepad or a digital note-taking app for accuracy.
Consider adding an extra inch to both dimensions. This ensures the new doors cover the cabinet openings fully. Double-check all measurements before ordering new doors.
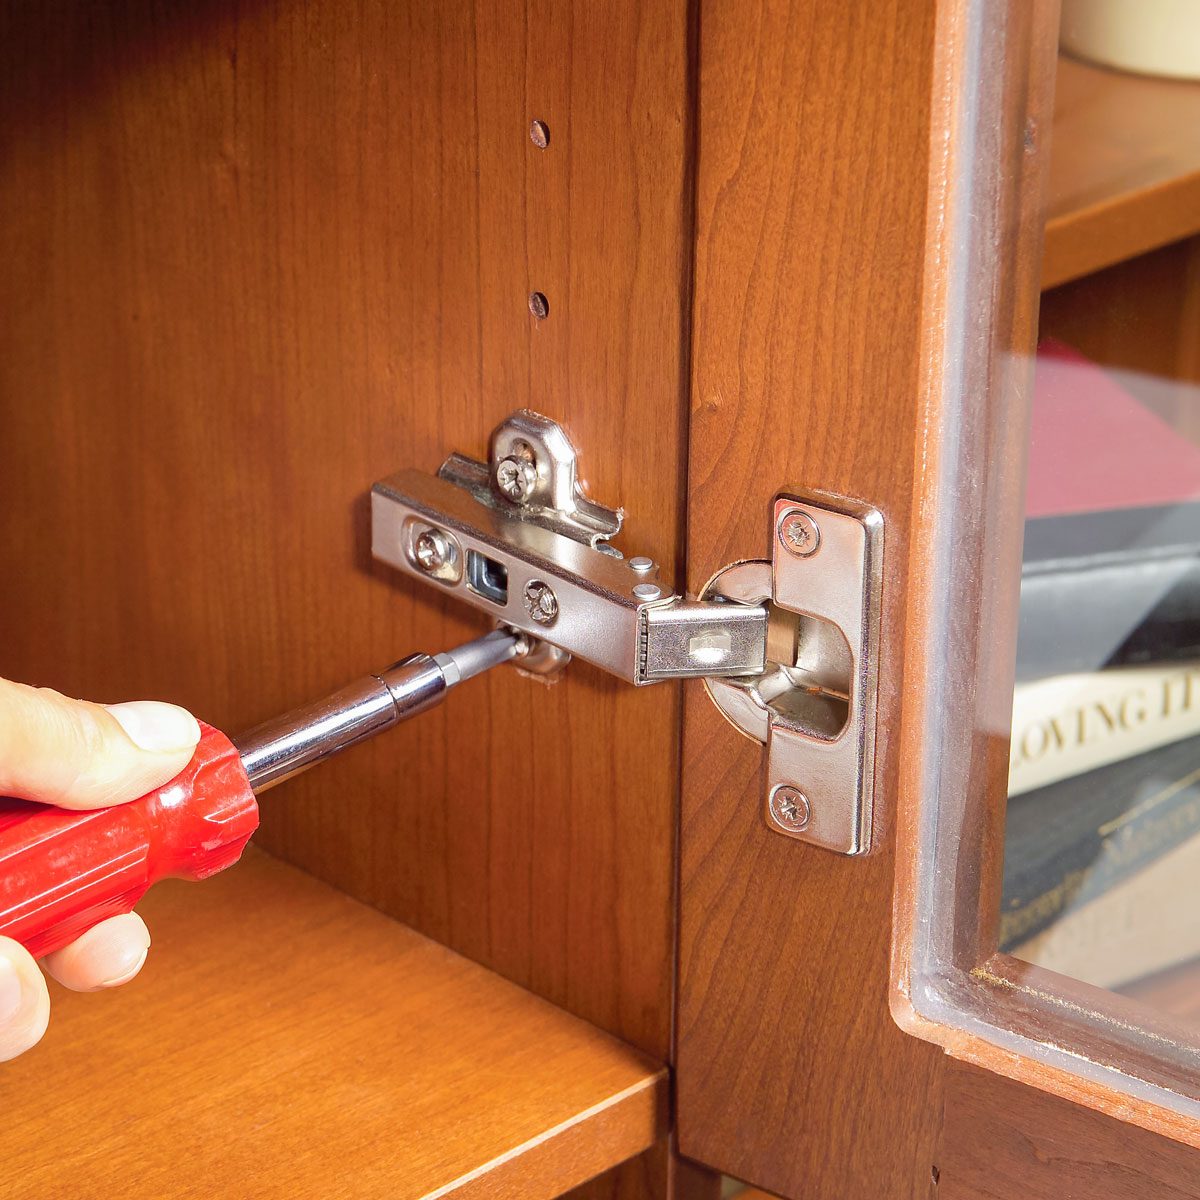
Installing Hinges
Installing hinges correctly is essential for smooth operation. Start by marking the spots for hinges on the new doors. Use a pencil and ruler for accurate placement. Ensure the marks are consistent on all doors.
- Mark hinge spots: Measure 2 inches from the top and bottom edges.
- Drill pilot holes: Use a small drill bit to make shallow holes at the marks.
- Attach hinges: Screw the hinges into the pilot holes using a screwdriver.
- Align doors: Hold the door against the cabinet frame and mark hinge spots on the frame.
- Install doors: Screw the hinges into the cabinet frame, ensuring the door hangs evenly.
Test the doors to ensure they open and close smoothly. Adjust the hinges if needed for a perfect fit. Well-installed hinges make all the difference.

Refinishing Cabinet Surfaces
Refinishing cabinet surfaces can breathe new life into your kitchen. It’s a cost-effective way to give your kitchen a fresh look. In this section, we’ll cover the steps needed to refinish your cabinets. This includes proper sanding techniques and the application of paint or stain.
Sanding Techniques
Sanding is a crucial step in refinishing cabinets. It helps remove old paint or stain. Sanding also smooths out any imperfections.
Follow these steps for effective sanding:
- Remove cabinet doors and hardware.
- Use 120-grit sandpaper for the first pass.
- Sand in the direction of the wood grain.
- Wipe away dust with a damp cloth.
- Switch to 220-grit sandpaper for a smooth finish.
Remember to wear a dust mask and safety goggles. This will protect you from fine particles.
Applying Paint Or Stain
Choosing between paint or stain depends on your desired look. Paint offers a smooth, opaque finish. Stain highlights the wood’s natural beauty.
Follow these steps to apply paint or stain:
| Step | Paint | Stain |
|---|---|---|
| 1 | Apply primer to the sanded surface. | Apply wood conditioner. |
| 2 | Let primer dry completely. | Allow conditioner to soak in. |
| 3 | Apply the first coat of paint. | Apply the first coat of stain. |
| 4 | Let the paint dry for several hours. | Wipe off excess stain with a cloth. |
| 5 | Apply a second coat if needed. | Repeat if a darker color is desired. |
Use a high-quality brush for smooth application. A foam roller can also be used for large surfaces.
Finish with a clear coat for added protection. This will make your cabinets durable and easy to clean.
Reassembling The Cabinets
Reassembling kitchen cabinets can be satisfying. This step brings your kitchen back to life. Ensure you follow the right steps for a sturdy finish. Let’s dive into the detailed steps.
Reattaching Doors
Reattaching cabinet doors is crucial. It ensures your cabinets look perfect. Follow these steps:
- Align the doors with the hinges.
- Use a screwdriver to secure the hinges.
- Check the alignment. Adjust if necessary.
Make sure the doors swing smoothly. Tighten any loose screws. This ensures longevity.
Securing To Wall
Securing cabinets to the wall is essential. It prevents accidents. Follow these steps:
- Find the studs in your wall.
- Mark the stud locations on the cabinet back.
- Use screws to attach the cabinets to the studs.
Ensure the cabinets are level. Use a level tool for accuracy. Tighten all screws securely.
Reassembling cabinets might seem hard. Follow these steps for a smooth process. Enjoy your refreshed kitchen!

Final Touches
Once you’ve completed the bulk of the work on your kitchen cabinets, it’s time for the final touches. These steps ensure your cabinets not only look great but also function perfectly. Let’s dive into the key actions you need to take.
Installing Hardware
Adding hardware like handles and knobs gives cabinets a polished look. Here’s how to install them:
- Choose your hardware. Select pieces that match your kitchen’s style.
- Measure and mark spots. Use a template or ruler for consistent placement.
- Drill pilot holes. Make sure they are the correct size for your screws.
- Attach the hardware. Use a screwdriver to securely fasten each piece.
Check that all handles and knobs are level. This ensures a professional appearance.
Inspecting Work
Before declaring the job done, inspect your work thoroughly. Follow these steps:
| Task | Details |
|---|---|
| Check doors and drawers | Ensure they open and close smoothly. |
| Look for gaps | Make sure there are no visible gaps or misalignments. |
| Tighten screws | Verify all screws are secure, including hinges and hardware. |
| Clean surfaces | Wipe down all surfaces to remove dust and fingerprints. |
These final touches make a significant difference. Your kitchen cabinets will look new and function well.
Frequently Asked Questions
How Do I Fix Loose Kitchen Cabinet Doors?
Tighten the screws on the hinges. Use a screwdriver to ensure they’re snug.
What Causes Kitchen Cabinets To Sag?
Sagging often results from overloaded shelves or weakened joints. Redistribute the weight and reinforce the joints.
How To Repair Chipped Cabinet Paint?
Sand the chipped area lightly. Apply matching paint with a small brush for a seamless finish.
Why Are My Cabinet Drawers Sticking?
Sticking drawers are usually due to warped wood or debris. Clean the tracks and consider lubricating them.
Can I Replace Just The Cabinet Doors?
Yes, replacing just the doors is possible. Measure carefully and match the new doors to existing cabinets.
How To Align Misaligned Cabinet Doors?
Adjust the hinges by loosening and repositioning them. Tighten the screws once the doors are aligned.
What Glue To Use For Cabinet Repairs?
Wood glue is ideal for most cabinet repairs. Ensure surfaces are clean and dry before applying.
How To Fix Water-damaged Cabinets?
Dry the affected area completely. Replace damaged parts and seal any exposed surfaces to prevent future damage.
How To Silence Noisy Cabinet Doors?
Install soft-close hinges or adhesive bumpers. These reduce noise and protect the cabinet surfaces.
What Tools Are Needed For Cabinet Repairs?
Basic tools include a screwdriver, wood glue, sandpaper, and a paintbrush. A level and clamps can also be useful.
Conclusion
Fixing kitchen cabinets can be a rewarding DIY project. Follow these steps for smooth, functional cabinets. Remember, proper maintenance extends their lifespan. With the right tools and patience, your kitchen will look great. Happy repairing!

