Yes, painted kitchen cabinets can chip over time. Proper preparation and high-quality paint can minimize chipping.
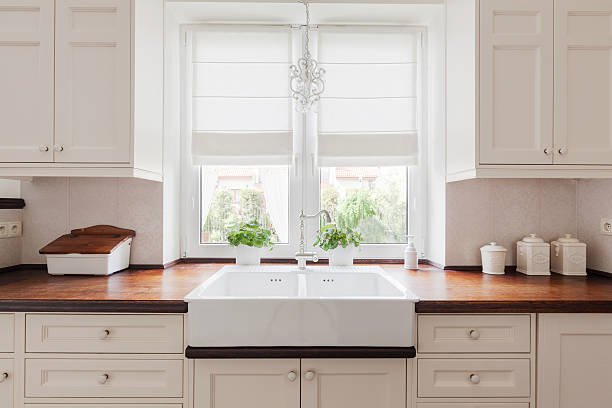
Painted kitchen cabinets offer a fresh, updated look to any kitchen. They provide an affordable way to revamp the space without a full remodel. With proper preparation, including sanding and priming, and using high-quality paint, you can achieve a durable finish.
Regular maintenance is crucial to keep them looking their best. Avoid harsh chemicals and abrasive cleaning tools to prevent damage. Choose paint designed for cabinetry to ensure longevity. While chipping can occur, taking these steps can significantly reduce the chances. Investing time in proper care will help maintain the beauty and functionality of your painted kitchen cabinets for years.
Credit: pristinepaintersnyc.com
Painted Cabinets: Pros And Cons
Painting kitchen cabinets can transform your space. It’s a popular choice for many homeowners. But, like any home improvement project, it has its pros and cons. Let’s explore the benefits and common issues with painted kitchen cabinets.
Benefits Of Painted Cabinets
Painted cabinets offer many advantages:
- Versatility: Choose any color to match your decor.
- Cost-Effective: Cheaper than replacing cabinets.
- Modern Look: Fresh paint can modernize your kitchen.
- Easy to Clean: Wipe down painted surfaces with ease.
- Eco-Friendly: Reuse existing cabinets and reduce waste.
Common Issues With Painted Cabinets
While painted cabinets are great, they have some drawbacks:
- Chipping: Paint can chip, especially in high-use areas.
- Maintenance: Requires touch-ups to keep them looking fresh.
- Surface Prep: Cabinets need thorough prep before painting.
- Drying Time: Paint needs ample time to dry and cure.
- Cost of High-Quality Paint: Quality paint can be expensive.
Using a table can help compare the pros and cons:
| Pros | Cons |
|---|---|
| Versatility | Chipping |
| Cost-Effective | Maintenance |
| Modern Look | Surface Prep |
| Easy to Clean | Drying Time |
| Eco-Friendly | Cost of High-Quality Paint |
Why Chipping Happens
Painted kitchen cabinets can transform a space, but they may chip over time. Understanding why chipping happens can help in preventing it. Let’s delve into the factors leading to chipping and the types of paint vulnerable to chipping.
Factors Leading To Chipping
Several factors can contribute to the chipping of painted kitchen cabinets. Knowing these can help you maintain your cabinets better.
- Quality of Paint: Low-quality paint may not adhere well to surfaces.
- Surface Preparation: Improperly prepped surfaces can cause paint to chip easily.
- Moisture: Kitchens are high-moisture areas, leading to paint deterioration.
- Usage: Frequent use and contact can wear down the paint.
- Temperature Changes: Fluctuating temperatures can cause the paint to expand and contract, leading to chips.
Types Of Paint Vulnerable To Chipping
Not all paints are created equal. Some are more prone to chipping than others.
| Type of Paint | Chipping Vulnerability |
|---|---|
| Latex Paint | High |
| Oil-Based Paint | Medium |
| Chalk Paint | High |
| Acrylic Paint | Low |
Latex paint and chalk paint are particularly prone to chipping due to their composition. They are less durable compared to other types of paint. Oil-based paint offers better adhesion but can still chip under stress. Acrylic paint is the most resilient, making it a good choice for kitchen cabinets.
Choosing The Right Paint
Choosing the right paint for your kitchen cabinets is crucial. The right paint can make your cabinets look fresh and new. It also helps in making them durable and resistant to chipping. Not all paints are suitable for kitchen cabinets. Some are more durable and chip-resistant than others.
Best Paint Types For Cabinets
There are several types of paint suitable for kitchen cabinets:
- Semi-Gloss: Offers a shiny finish and is easy to clean.
- Gloss: Provides a high-shine look and is very durable.
- Satin: Has a soft sheen and hides imperfections well.
Semi-gloss and gloss paints are more resistant to moisture. Satin paint offers a good balance between sheen and durability.
Durable Paint Brands
Some paint brands are known for their durability:
| Brand | Features |
|---|---|
| Benjamin Moore Advance | Self-leveling, hard finish, and easy to clean. |
| Behr Marquee | Stain-blocking, one-coat coverage, and durable finish. |
| Valspar Cabinet Enamel | Non-yellowing, durable, and smooth finish. |
Choosing these brands ensures a long-lasting finish. They offer excellent coverage and durability, reducing the likelihood of chipping.
Credit: pristinepaintersnyc.com
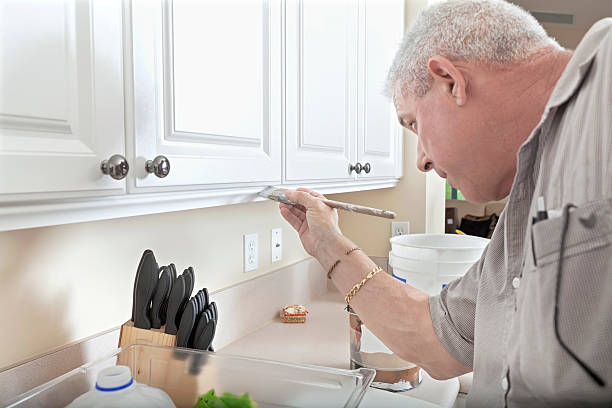
Prepping Your Cabinets
Prepping your cabinets is the first step in ensuring your painted kitchen cabinets don’t chip. Proper preparation can make a significant difference. This involves cleaning, sanding, and priming. Let’s dive into each of these steps.
Cleaning And Sanding
Clean your cabinets thoroughly before painting. This removes grease, dirt, and old paint. Use a mild detergent or a specialized cleaner. A mix of water and vinegar also works well.
- Remove all cabinet doors and hardware.
- Scrub every surface you plan to paint.
- Let them dry completely before moving to the next step.
Next, sand the surfaces to create a smooth, even base. Sanding helps the paint adhere better. Use medium-grit sandpaper for this task.
- Start with 120-grit sandpaper.
- Sand in the direction of the grain.
- Finish with 220-grit sandpaper for a finer surface.
After sanding, wipe the dust away with a damp cloth. Make sure no dust remains before you start priming.
Priming For Longevity
Priming is essential for a durable paint job. It helps the paint stick and prevents chipping. Use a high-quality primer for best results.
| Primer Type | Benefit |
|---|---|
| Oil-based | Seals wood and prevents stains |
| Shellac-based | Excellent adhesion and sealing |
| Water-based | Easy cleanup and low odor |
Apply the primer in thin, even coats. Let each coat dry before applying the next. Two coats are usually sufficient.
- Use a brush for detailed areas.
- Use a roller for larger surfaces.
- Sand lightly between coats for a smoother finish.
Proper priming ensures your paint job lasts longer and resists chipping.
Proper Painting Techniques
Painting kitchen cabinets can transform your kitchen. But, will painted kitchen cabinets chip? The answer depends on the techniques used. Proper painting techniques ensure durability and a professional finish. Below, we explore the essential steps and tools needed for a chip-free paint job.
Tools And Equipment
Using the right tools is essential for a smooth finish. Here is a list of tools and equipment you will need:
- Sandpaper (120 and 220 grit)
- Primer (oil-based or shellac)
- High-quality paint (acrylic or alkyd)
- Paintbrushes (angled and flat)
- Foam roller
- Painter’s tape
- Drop cloths
- Tack cloth
- Degreaser
Step-by-step Painting Guide
Follow these steps for a professional finish and to avoid chipping:
- Preparation: Remove cabinet doors and hardware. Clean surfaces with a degreaser.
- Sanding: Use 120-grit sandpaper to roughen surfaces. Wipe away dust with a tack cloth.
- Priming: Apply a coat of primer. Let it dry completely.
- Sanding Again: Sand the primed surface with 220-grit sandpaper. Wipe away dust.
- First Paint Coat: Apply the first coat of paint using a brush or foam roller. Let it dry.
- Second Sanding: Lightly sand the first coat. Remove any dust.
- Second Paint Coat: Apply the second coat of paint. Allow it to dry thoroughly.
- Final Touches: Reattach doors and hardware. Enjoy your new cabinets!
Using these proper painting techniques reduces the risk of chipping. It also ensures a beautiful, long-lasting finish.
Sealing And Finishing
Sealing and finishing your painted kitchen cabinets is crucial. Proper sealing ensures your cabinets remain chip-free and look fresh. Learn about top coats, sealants, and how drying and curing play a part.
Top Coats And Sealants
Applying a top coat protects the painted surface. It adds a layer of durability. Choose from various sealants like polyurethane, polycrylic, or wax.
Polyurethane is known for its toughness. It resists scratches and chips. Use it on high-traffic areas.
Polycrylic is water-based and easier to apply. It dries clear, maintaining the original color.
Wax offers a natural finish. It’s best for a rustic or matte look.
| Sealant | Durability | Finish |
|---|---|---|
| Polyurethane | High | Glossy or Satin |
| Polycrylic | Moderate | Clear |
| Wax | Low | Matte |
Drying And Curing
After applying the paint and sealant, let it dry. Drying time varies by product. Usually, it takes a few hours.
Curing is different from drying. It is the time needed for the finish to harden fully. Curing can take days or weeks.
During curing, avoid using the cabinets. This ensures the finish sets properly. Here are some tips:
- Avoid placing items on the cabinets.
- Keep the kitchen ventilated.
- Check the product label for specific times.
Proper drying and curing prevent chips. Be patient for the best results.
Maintenance Tips
Maintaining painted kitchen cabinets is essential to keep them looking fresh. Proper care can prevent chipping and extend the life of your cabinets. Here are some easy maintenance tips to keep your painted kitchen cabinets in top shape.
Cleaning Painted Cabinets
Regular cleaning prevents dirt buildup and keeps cabinets looking new. Use a soft cloth or sponge with warm, soapy water. Avoid harsh chemicals that can damage the paint. For stubborn stains, a mixture of baking soda and water can be effective.
Follow these steps for the best results:
- Dust the cabinets with a microfiber cloth.
- Mix warm water with mild dish soap.
- Dip a soft cloth or sponge into the solution.
- Gently scrub the surface in small sections.
- Rinse the cloth with clean water and wipe down the cabinets.
- Dry with a clean, soft towel to prevent water spots.
Handling Minor Chips
Even with the best care, minor chips can occur. Small chips are easy to fix with a touch-up kit matching your cabinet color. Follow these steps:
- Clean the chipped area with a damp cloth.
- Use fine-grit sandpaper to smooth the edges around the chip.
- Apply the touch-up paint with a small brush.
- Let the paint dry completely before using the cabinet.
For deeper chips or cracks, wood filler can be used before painting. Apply the filler, let it dry, then sand smooth before painting.
Regular maintenance and quick repairs will keep your painted cabinets looking their best. Following these tips can significantly reduce the risk of chipping and maintain the beauty of your kitchen.
Credit: www.reddit.com
When To Repaint
Painted kitchen cabinets can make any kitchen look fresh and modern. Yet, over time, the paint may chip or wear out. Knowing when to repaint can help maintain your kitchen’s charm and functionality.
Signs It’s Time To Repaint
Here are some common signs that it may be time to repaint your kitchen cabinets:
- Visible Chipping: Small chips on the cabinet surface.
- Faded Color: The paint appears dull or discolored.
- Peeling Paint: Paint starts to peel off in sheets.
- Stubborn Stains: Stains that can’t be cleaned.
- Scratches and Dents: Numerous small scratches and dents.
Repainting Best Practices
Follow these best practices to ensure a smooth repainting process:
- Preparation: Clean and sand the cabinets thoroughly.
- Prime the Surface: Apply a high-quality primer.
- Use Quality Paint: Choose a durable, high-quality paint.
- Apply Multiple Coats: Two to three coats provide the best coverage.
- Drying Time: Allow ample drying time between coats.
By following these steps, your cabinets will look new and last longer.
Frequently Asked Questions
Will Painted Kitchen Cabinets Chip Easily?
Proper preparation and quality paint reduce chipping. Use a durable topcoat for extra protection.
How To Prevent Cabinets From Chipping?
Sand and prime surfaces well. Use high-quality paint and a protective topcoat. Handle cabinets gently.
Are All Paints Prone To Chipping?
No, high-quality, durable paints are less likely to chip. Choose paints specifically designed for cabinetry.
Can I Fix Chipped Painted Cabinets?
Yes, touch-up paint or a small brush can fix chips. Sand the area first for better adhesion.
How Long Will Painted Cabinets Last?
Well-painted cabinets can last years. Longevity depends on paint quality, preparation, and maintenance.
What Causes Paint To Chip?
Poor surface prep, low-quality paint, moisture, and heavy use can cause chipping. Proper care reduces these risks.
Is Professional Painting Better?
Professionals ensure proper prep and application, reducing chipping risks. They often use higher-quality materials.
Can I Repaint Chipped Cabinets?
Yes, clean, sand, and prime before repainting. Use a durable topcoat to prevent future chipping.
Should I Use A Topcoat?
Yes, a topcoat protects paint from chipping and wear. It adds durability and longevity to the finish.
Are Dark Colors More Likely To Chip?
No, chipping depends on prep and paint quality, not color. Dark colors might show chips more visibly.
Conclusion
Painting kitchen cabinets can be a durable and stylish choice. Proper preparation and high-quality paint reduce the risk of chipping. Regular maintenance and gentle cleaning keep them looking fresh. Investing time and effort ensures a long-lasting finish for your painted kitchen cabinets.
Enjoy a beautiful and functional kitchen space.

